Enchantment Learning & Living Blog

Welcome to Enchantment Learning & Living, the inspirational space where I write about the simple pleasures, radical self-care, and everyday magic that make life delicious.

Vegan Bacon Recipe

I know, I know. Vegan bacon is a total oxymoron! Strange name aside, I can promise you that it tastes delicious. I began my quest for healthier breakfast sides after I realized this past winter that I was eating more and more bacon come the weekend which was bad for my waistline and health. Then I realized what I really loved about bacon is that it made me feel fancy. Breakfast could be a decadent diner plate with scrambled eggs, buttery toast, and yes, bacon. 

So then the quest began. How do I make a healthier weekend breakfast side? I was inspired by these recipes from Minimalist Baker and Veganosity, but as always, modified them so that I didn't have to buy any special ingredients--those things that usually end up getting used once and then thrown out (yet another attempt for me to waste less is to buy only condiments and ingredients I know I'll use). An added bonus to this recipe? Eating less meat is better for the environment all around, not just for your health.

Typically I avoid most things called vegan because they end up being highly processed. I would also rather eat something that tastes like what it is, like tofu for example, rather than beef flavored tofu. I mean, how many gross additives and artificial ingredients go into making fake meat? Yuck! All that artificial stuff is hardly good for the environment either. There are, of course, a few exceptions, like this bacon and my vegan fudge, both of which use only natural ingredients and only foodstuff that I already have in my pantry: maple syrup, amino acids, garlic, and chipotle chile powder. Together these ingredients make for a sweet smokey flavor akin to bacon. If you have never used amino acids before, give them a try! I started using Braggs liquid amino acids as a healthier substitute for soy sauce and haven’t looked back since. 

This recipe works well with eggplant (pictured here) as well as mushrooms. I have even seen people use carrots and turnips, though I have yet to try those options. You can slice these longways or, as I prefer, in circular discs. The big thing you need to make sure you do is to use a mandolin or other sharp cutting tool to produce thin, even slices so your pieces cook evenly. If they are too thick, they won’t have that crispy bacon feel.  

All in all, this vegan bacon is the perfect blend of crispy, salty, and smokey--and it goes great with scrambled eggs and toast! 

ingredients: 

1 eggplant, thinly sliced  

1/4 cup Braggs liquid amino acids

1/4 cup maple syrup

1/2 tablespoon smoke chipotle powder

1-2 cloves garlic, minced

Combine all ingredients, except the eggplant, in a shallow pan or bowl. Then place eggplant slices in mixture and let marinate at least 30 minutes. I usually let them marinate overnight for best flavor. To cook, squeeze the moisture from eggplant piece so they are as dry as possible. This will ensure that they get crispy while cooking, not soggy. Heat oil in frying pan on medium. Once the pan is hot, place first round of eggplant on pan’s surface and cook without flipping for 1-2 minutes, watching carefully so that pieces crisp up, not burn. Flip pieces and repeat on the second side until browned. These are best eaten hot with scrambled eggs and toast. Serves 4-6. Enjoy!

Eggplant Dish

Enchantment Learning & Living is an inspirational blog celebrating life’s simple pleasures, everyday mysticism, and delectable recipes that are guaranteed to stir the kitchen witch in you. If you enjoyed what you just read and believe that true magic is in the everyday, subscribe to my newsletter below for regular doses of enchantment. Want even more inspiration? Follow me on Instagram, Facebook, Pinterest, and Twitter. Here’s to a magical life!

Cabbage Steaks Recipe

One of the ways we can reduce our carbon footprint is to simply eat less meat (and when we do eat it, to make sure it is grassfed, organic, and local). I don’t eat a whole lot of meat to begin with which means I’m always on the lookout for a delicious veggie-based meal, especially when it comes to dinner.  So when I came across this recipe for cabbage steaks, I was excited to try them. Now, it should come as no surprise that grilling cabbage will not make it taste like steak. That said, I love this dish. It’s earthy, tasty, and super healthy for you and the planet. 

I tweaked the original recipes to include a splash of red chile to the mustard sauce and swapped the rosemary for tarragon to the marinade. You can make this either by roasting whole slices of cabbage or sear them individually in a hot pan. I like to pare these steaks with cannelloni beans or a simple salad. The recipe is easy enough to make and tasty enough to feel like a decadent dinner. Yum!

Ingredients:

For steaks:

whole red cabbage

olive oil 

1 tbs fresh tarragon, chopped

2 cloves garlic, minced

salt to taste

For sauce:

1/2 cup olive oil

1/2 cup apple cider vinegar

1 tsp red chile powder

1 tsp pepper

2 tbs mustard

1 small shallot, minced

salt to taste

Preheat oven to 425 degrees. Cut cabbage into one-inch thick slices. You can cut the tip of the stem off, but do not completely core it or the steak will be unable hold together. Lay cabbage steaks flat on an oven pan, making sure to rub top side with olive oil, tarragon, garlic, and salt, then flip over and do the same to the second side. Place pan in oven and roast for twenty minutes. Alternatively, slice desired amount of cabbage, rub in olive oil, tarragon, and garlic, then let sit for 15 minutes. Heat frying pan medium hot. Add oil and cabbage steak slice. Let sear for 2 minutes, flip, and sear another two minutes. 

For the sauce, let minced shallots marinate in vinegar for 15 minutes in jar, then add all other ingredients and shake. Serve steaks immediately, with a simple salad or a side of cannelloni beans sauteed in ghee and garnished with shredded kale, or (pictured here) with some parmesan-crusted snowpeas.

IMG_2095.jpg

Enchantment Learning & Living is an inspirational blog celebrating life’s simple pleasures, everyday mysticism, and delectable recipes that are guaranteed to stir the kitchen witch in you. If you enjoyed what you just read and believe that true magic is in the everyday, subscribe to my newsletter below for regular doses of enchantment. Want even more inspiration? Follow me on Instagram, Facebook, Pinterest, and Twitter. Here’s to a magical life!

Mushroom Pate Recipe

I’m a sucker for a good appetizer. Come Saturday, all I want is a beautiful cocktail and a luxurious nibble for happy hour. What can I say, it makes me feel fancy!

One of my favorite go-to recipes, especially in the winter, is this mushroom pate. It’s rich, decadent and…healthy. Real talk: sometimes this *is* my dinner come Saturday night. Paired with some delicately bitter endive and a few slices of crostini, it’s a light meal that still makes you feel ritzy, even if you are eating this dish in your jammies (winky face). 

I especially love this pate because it is so versatile. To make it vegan, omit the milk. The dairy makes it taste a little creamier, but the dish is equally delicious without it. You can also swap out the milk for a tablespoon of goat cheese or even nutritional yeast. See what I mean? Versatile! Likewise, you can use any kind of mushrooms, from simple button or crimini to more exotic portobello, oyster, or chanterelle mushrooms. The type of mushrooms you choose of course affects the flavor. I’ve made this dish with all mushroom types and found them all just plain tasty.

Another perk of this recipe is that you can make as much or as little as you want. Below, I’ve given you the measurements for about one pound of mushrooms, but you can make more or less, depending on your needs.

Ingredients:

1 lb mushrooms, diced 

2 tbs fresh sage, chopped

1 clove garlic, minced

1 tsp pepper

1 tsp milk or cream (optional)

salt, to taste

olive oil

Heat oil on medium. Add garlic and sage, then cook on low for a minute or so. Add more oil and diced mushrooms, turning heat up to medium-low. Let mushroom sit, only turning every few minutes, for 15-20 minutes. Remove from heat. Let cool.

Once mushrooms have cooled, place them in blender and mix them together until mixture resembles a thick paste, but still has bits of bigger mushroom pieces in it. To make this a more authentic pate, you can chill it for an hour and then serve. It is, however, equally delicious warm. Plate with crostini, radicchio, endive, or other crudite. Top with chives or more sage. Serves 4.

Enjoy!

IMG_9723.JPG

Enchantment Learning & Living is an inspirational blog celebrating life’s simple pleasures, everyday mysticism, and delectable recipes that are guaranteed to stir the kitchen witch in you. If you enjoyed what you just read and believe that true magic is in the everyday, subscribe to my newsletter below for regular doses of enchantment. Want even more inspiration? Follow me on Instagram, Facebook, Pinterest, and Twitter. Here’s to a magical life!

5 Ways to Nourish the Goddess Within

These past few weeks have been filled with a series of synchronicities that have reminded me of the importance of self-care.  The first thing that happened was that after an amazing (and incredibly busy) first week back teaching, I started the long weekend feeling under the weather.  I had every intention of doing all the things from attending wine festivals to dancing late into the night, to any other shenanigans that came my way.  But I had only just been saying, in light of my fuller-than-usual schedule this term, that I needed to be sure to make self-care a priority.  It seemed life took over so that I had to follow through with my statement.  There was no doubt about it--I felt a cold coming on and the only thing I could do was rest and relax until it went away.  I literally had no choice but to take care of myself!

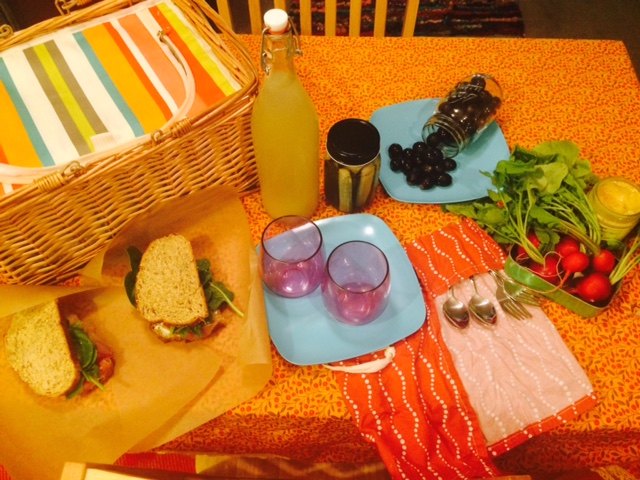
So I rested.  And I took long naps and did gentle yogas and drank copious amounts of tea.  And it was...delicious.  It was three whole days of cooking healthy meals inspired by farmers' market finds and indulging in afternoons reading my trashy books.  It made me realize how little attention I had been paying to my internal life.  With all the excitement a new school year brings and the enjoyment of my extroverted new literacies I'd been cultivating, I'd neglected to nourish my yin energy.  

...and then the universe kept speaking to me in synchronous code. 

The first synchronous event came when I learned that the first Sunday of September was World Goddess Day.  Trust me.  It's a thing. The more I read about it, the more I loved the idea of devoting the day to goddess energy so as to cultivate it year round.  In such a male-centric society that values extroversion, logic, and concrete accomplishments, goddess energy reminds us of the equally important need to nourish introversion and tend our emotional and psychic lives.

The unfolding work weeks were spent in equal measures of sleep and homey nourishment simply because I had no energy for anything else.  During this dormant time, a funny thing started to happen.  I was seeing goddess wisdom everywhere.  In my newsfeed.  On TV.  In books.  Even in my tarot deck.  She was everywhere.  I began to think the universe was trying to tell me something.  I was being reminded of the power of the feminine, the power of quiet and simple pleasures, the power of home as medicine.  Such is the way of synchronicity.  

After I tuned back into my own magic, I realized that it is too easy to forget to care for ourselves, too easy to lose track of the big picture as we navigate our day to day, too easy to dismiss pleasurable things as unimportant.  We all have things we have to get done, after all.  But the Goddess Within reminds us that we can be a boss in our outer daily lives and still nourish our internal lives.  I needed tender things these past few weeks, gentle things and beautiful things to restore myself.  I needed to read fun books and lighten my energy.  And I needed to imbue my home with the delicious essence of divinely beautiful living.  

So who is the Goddess Within?  She is the one who rises above the daily debris that might weigh us down--she sees the big picture of life so we don't get stuck on the small mundanities. She is sensuous and beautiful, at home in her body. She loves to indulge in the pleasures of life. She doesn't hesitate to care for herself--as we so often can in the world that seems to demand more and more of us. She is at home with her emotions and the psychic world. In short, she is pure magic.

Now that I'm no longer sick, I want to maintain the blissful feelings of goddess-inspired self-care--minus the scratchy throat.  I've found that there are five easy ways to nourish the Goddess Within, even when life might seem hectic.  Find her and love her with these tips:

1. Invite the goddesses into your home.  As you know, I'm a huge proponent making a home a sanctuary, not just a place to crash at the end of the day.  One of my favorite decor books, The Goddess Home Style Guide, reminds us of the power of invoking the archetypal forces of goddesses like Aphrodite, Athena, and Demeter as you decorate your space.  Take Aphrodite's lead and make your bedroom a sensuous space for dreaming and delighting.  Make your bathroom reflect the sea-kissed shores she was birthed from.  Allow Demeter to fill your kitchen with the harvest's abundance, and Athena to make your writing desk a celebration of imagination and intellectual curiosity. The more you cultivate goddess wisdom within your space, the more you feel inspired to make each act within those spaces deliberate and joyful.

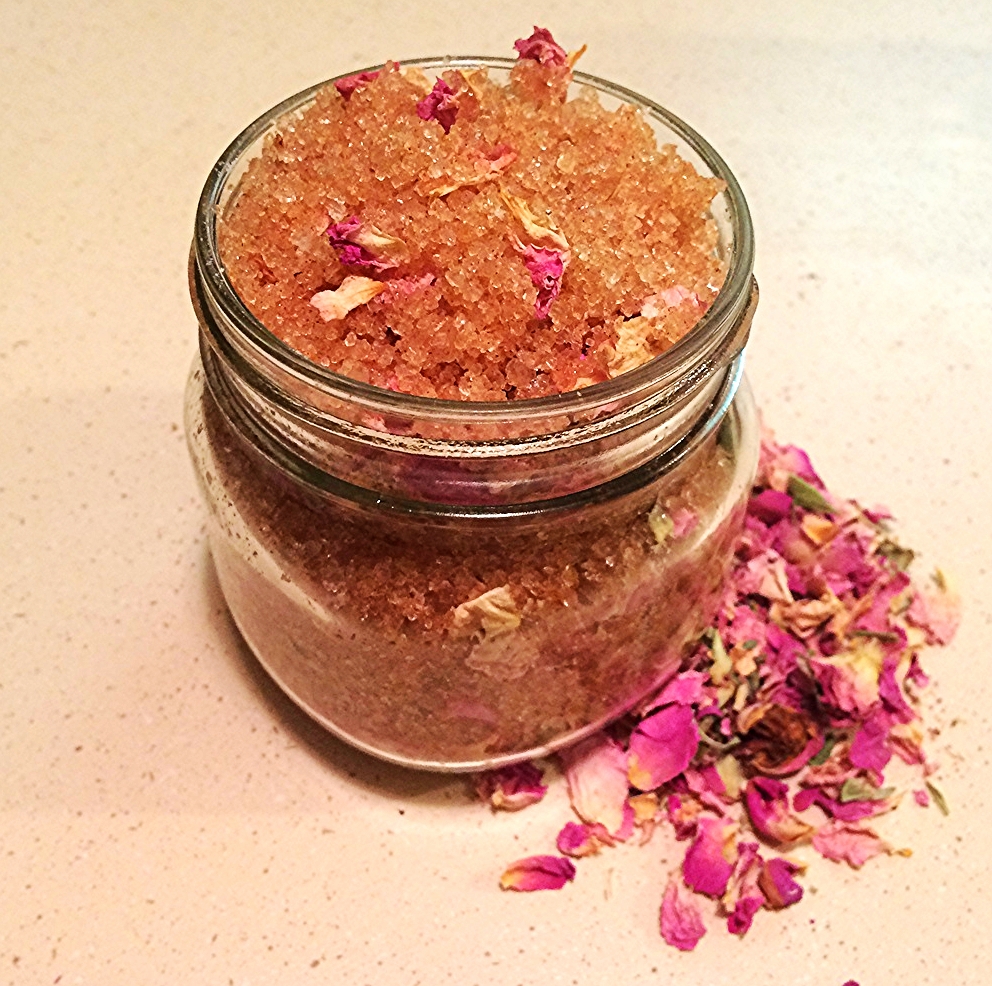
2. Love your body.  Each curve, each scar, each freckle.  Love it all.  And treat it right.  Exercise and do yoga and wear clothes that fit well.  Enjoy the sensuous pleasures of satin jammies. Slather it in body butter and soak your locks in honey. We are inundated with images of airbrushed bodies on magazines and other media about how to reshape ourselves into an ideal form of beauty; it's important to remember that healthy and happy override a certain dress size.  I mean look at Botticelli's Aphrodite: big hips, small breasts, round belly.  Hardly fulfilling today's beauty ideals, but she's THE GODDESS OF LOVE.  Take your cues from her and recognize that beauty comes in all different shapes and sizes. 

3.  Protect your you time.  The Goddess Within is tender and playful, sure, but she's a warrior too. It can be hard to say no or be done working for the day.  We live in a culture that can slowly start demanding more and more of us.  As women especially, we can struggle to draw important boundaries that lead to a more balanced life.  So invoke the warrior!  Say no to things.  Carve out space for what brings you joy and get comfortable establishing limits.  Loving the Goddess Within doesn't mean your energy is limitless, it means that you know how to replenish yourself and create space for simply being.

4.  Stay connected to everyday magic. Okay, so this one is probably a no-brainer considering I pretty much write about everyday magic ALL THE TIME.  But even as I write about it and firmly believe in its power, I can still sometimes find myself disconnected from it.  And when I am, the world is a lot less wondrous, and a lot more gray.  The disconnection happens when I'm overly tired and get a little numb, hence the gray.  I've found that creating more space in my day to breathe and focus on being receptive to the beautiful things around me--like the synchronicities that lead me back to my magic--goes a long way to keeping my magic strong.  Remember there is more to this world than checklists and schedules. 

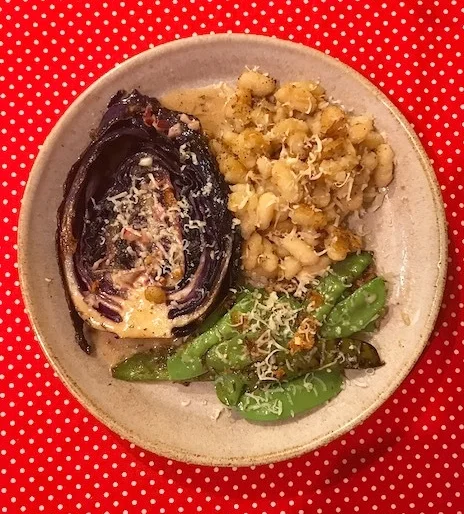
5.  Make every routine a ritual.  You're tired.  You want to put on some pajamas and veg out in front of the TV, but there's laundry to do and dinner to cook.  Celebrate those chores, rather than dread them by turning them into rituals that help you unplug from your workday and reconnect with yourself.  So I have to turn my compost--good.  Dirt in my fingernails grounds me and feeding the worms connects me to nature.  So I don't know what to cook for dinner--I'll start with sauteeing an onion and let my farm fresh ingredients speak to me.  Taking the extra time to cook a healthy meal allows me to nourish my whole being and enjoy the sensuousness of sauteeing vegetables.  It allows me to slow down and reconnect to the deliciousness that is life.  Throw in a jazz record and a glass of wine, and you've got the makings of a divine evening.

...and I'll leave you with one last bonus tip for nourishing the Goddess Within, she who is abundant and powerful and infinite in her joy: leave time to dream.  Dreams, after all, are seeds that eventually sprout.  

Birth_of_venus.jpg

Enchantment Learning & Living is an inspirational blog celebrating life’s simple pleasures, everyday mysticism, and delectable recipes that are guaranteed to stir the kitchen witch in you. If you enjoyed what you just read and believe that true magic is in the everyday, subscribe to my newsletter below for regular doses of enchantment. Want even more inspiration? Follow me on Instagram, Facebook, Pinterest, and Twitter. Here’s to a magical life!

Midnight Meteor Shower Picnics

This has been the summer of picnics.  At the park.  In the backyard.  Midday under a shade tree to beat the heat or post-monsoon afternoon searching for rainbows and sipping iced tea.  Any summer occasion is a special occasion and so worthy of its own picnic.  Naturally, when I found out that tonight marks the start of the annual Perseids meteor shower, four little words entered my mind: Midnight.  Meteor.  Shower.  Picnic.

Seriously, what could be better?

Earlier this season, I wrote about how to plan the perfect picnic.  But it has now occurred to me that midnight picnics are their own kind of event mostly because the focus is less on good food and more on the night sky, especially for such a special shower we should expect to see tonight.  

What makes it so special this time around?  Well, we are likely to see twice as many shooting stars this year (almost 200 an hour compared to the average 100) as in previous ones.  This is because of an "outburst," which is when the earth's previous orbit debris mixes with our current debris (yeah, I'm not sure quite how it works either...but you can read more about the specifics here).  The bottom line is that we will be gifted with a spectacular meteor shower that can't be missed!  So make sure to plan ahead, pack plenty of creature comforts, and prepare for a lovely night of stargazing. The show starts at 10pm Thursday and goes into early Friday morning.

1.  Bring blankets.  While all picnics require a thick blanket to sit on, a midnight picnic requires other wraps of soft throws to snuggle under as the desert night turns cooler.  Maybe even a few pillows to lie back on as you stargaze.  Think of it as making an impromptu outdoor bed.

2. Plan to stay awhile.  Looking for shoot stars is like fishing--you have to be prepared to sit and wait in order to catch something good (either a fish or a star, wink wink).  If you rush the experience, you miss out on witnessing the beauty of shooting stars. Treat it like a meditation--truly, there is nothing more lovely on a summer night than stargazing, even without a meteor shower.  So pass the time by trying to map constellations like Perseids, where the shower originates, or make up your own.  What matters is that you take the time to converse with the stars.

3.  Pack a thermos (and a flask if you're feeling risqué!).  A mug of hot tea will keep you both revived and awake while you stargaze.  Fill it with an energizing (but caffeine free) herbal tea and bust it out when a case of the sleepies hits. You'll keep yourself awake for the big event without hindering your ability to get some Zzzzs once you're ready for bed.

4.  Pack easy snacks.  As with any picnic, you should keep your food delicious and simple; that goes double for a midnight meteor shower show.  Think blueberries, nuts and edible treats that won't distract you from your stargazing.  The point is to nosh as needed without tearing your gaze away from the sky.  

5.  It's all about location, location, location--this is especially important for shooting star viewing. Now we can't always get to the perfect location, but if you can, find a spot away from harsh city lights that drown out the glittering stars.  Or, if you're like me, and going to stargaze in your backyard, turn off all the lights and notice how many more stars you can see.  

Summer is by far one of the best times to forget about the clock and spend some time communing with the universe, getting lost (found?) in the constellations adorning the night sky, and keeping an eye out for those elusive shooting stars.  Happy stargazing! 

Enchantment Learning & Living is an inspirational blog celebrating life’s simple pleasures, everyday mysticism, and delectable recipes that are guaranteed to stir the kitchen witch in you. If you enjoyed what you just read and believe that true magic is in the everyday, subscribe to my newsletter below for regular doses of enchantment. Want even more inspiration? Follow me on Instagram, Facebook, Pinterest, and Twitter. Here’s to a magical life!

5 Tips for the Perfect Picnic

Picnics are one of the most delicious simple pleasures of summer.  There's nothing quite like a leisurely afternoon nibbling on tasty treats and sipping lemonade in the park or lazily reading (okay snoozing) under a shady tree after an impromptu outdoor lunch.  I especially like how adaptable picnics are; they can be everything from a lavish outdoor afternoon tea or as basic as a sandwich and peach enjoyed in your backyard. It's also the perfect way to turn a quick lunch into an event that makes us slow down and appreciate the world around us.

Imagine my joy when I found out that there is actually a day on the calendar dedicated to this wonderful pastime.  June 18th is the official International Picnic Day.  As if I needed an excuse to bust out my basket!  To get ready for this big day, I give you five tips for the perfect picnic.

1.  Plan ahead.  I've gotten in the habit of keeping a picnic basket on standby along with a little grab 'n go bag filled with the basics: a blanket, a straw hat, homemade sunscreen, DIY bug repellent, and a book or two (for that afternoon snooze, wink wink).  My basket likewise includes a stash of reusable enamel plates, silverware, stemless cups, cloth napkins, and kitchen towels (for inevitable spills).  This makes impromptu picnics easy and carefree. I simply load up some food then I'm out the door. Last but not least, don't forget to keep an eye on the weather and know your location--both determine what additional accoutrements you might need.

2.  Keep it simple.  A good picnic is all about enjoying the great outdoors with little fuss.  One of the best picnics I have ever had was when I was in Sitges, a lovely beach town near Barcelona.  We put together a hasty picnic from goodies at a nearby market: olives, jamon, dried fruit, caper berries, nuts, cheeses, and crusty bread were heartily enjoyed on the beach.  We had no plates or silverware, just the bags our goodies came in.  Bliss!

Ahhhh that perfect no-fuss picnic at the beach in Sitges...

Ahhhh that perfect no-fuss picnic at the beach in Sitges...

I used to be enamoured with the idea of making fancy feasts for my picnics--complex meals and fussy seating inspired by what I saw in magazines--but they always proved more trouble than they were worth.  Food got soggy or was difficult to eat, preparation was always more labor intensive than I thought it would be, and I found myself spending way more time (and money) on a good picnic than I did actually enjoying it. The reverse was also true: the more low-maintenance the picnic plans were, the more fun I had.  Now this doesn't mean that you can't have your lavish afternoon tea party, just keep the menu uncomplicated with easy to assemble tea sandwiches and other make-ahead treats. So bottom line: simple be thy mantra. 

3.  Go green.  Ditch the plastic cups and other disposable items. Use cloth napkins, real silverware, reusable storage and durable plates.  Picnicking is all about enjoying nature so it only makes sense that you would make sure not to use disposable goods that damage the environment.  If you don't want the hassle of bringing along plates, you can always up the fun factor by using foods that fit easily in mason jars for a low maintenance picnic.  Greening your picnic basket has aesthetic benefits as well--your spread will look so much lovelier using real tableware or mason jars!  You can even keep a stack of durable enamel dishes at the ready in your picnic basket for easy prep like I do.  Want more ways to green your picnic routine?  Check out Pure Home & Body has to say.  

An assortment of easy-to-prepare goodies and reusable dishes ready for the basket.

An assortment of easy-to-prepare goodies and reusable dishes ready for the basket.

4.  Keep it real...the food that is.  In keeping with my theme of simplicity, stick to whole foods and easy nibbles.  Grapes, olives, cheese and a good loaf of bread are hard to beat (remember that Sitges picnic I told you about?).  You can also pack a mason jar salad--my Greek or Tuna-less Nicoise mason jar salads would be delish--or an assortment of in-season veggies with an Aioli or Pesto dip.  When you use fresh quality food, preparation is at a minimum.  Ripe cherry tomatoes are delicious on their own or tossed into this quick Tomato & Mozzarella Salad while fruit gets an extra kick from cured meat in my Prosciutto Wrapped Apricots.  Use what you have in your fridge, including Quick Pickled Veggies or Apricot Basil Jam paired with Ricotta, for a no-fuss meal.  

Dessert should be equally easy: dark chocolate and fruit, or single-serve bites like my Vegan Peanut Butter Fudge.  If you are sticking close to home, you can stash Mango Chile Lime or Pina Colada pops in the freezer until you are ready for them in your backyard.  Top off your meal with a bottle of bubbly, Orange Lavender iced tea, or lemonade and you're good to go.  If you want to go the extra mile, you could even whip up a batch of Coconut Water Kiwi Lime Cocktails (vodka optional) or a pitcher of Watermelon Coolers.  

5. Make it festive! Now that you have your easy menu and picnic goodies at the ready for a spur-of-the-moment lunch, you can indulge in the picnic's whimsical side. Wear a blowsy hat and frilly dress to this oh-so-important date, scatter edible flowers across your plates, bring bubbles for the kiddos (and kids at heart), and get ready to twirl in the sunlight.  Or take a cue from one of your favorite literary picnics and plan your meal around it.  This a strawberry-picking inspired feast from Emma (but without the drama!), a honey-laced affair that would make Winnie the Pooh proud, or invite Alice and the Mad Hatter for a tea party on the lawn.

Whatever the occasion, whatever the plan, summer is for picnics.  

A delicious spread for two strewn with edible nasturtium and pansies for a touch of whimsy.  

A delicious spread for two strewn with edible nasturtium and pansies for a touch of whimsy.  

Enchantment Learning & Living is an inspirational blog celebrating life’s simple pleasures, everyday mysticism, and delectable recipes that are guaranteed to stir the kitchen witch in you. If you enjoyed what you just read and believe that true magic is in the everyday, subscribe to my newsletter below for regular doses of enchantment. Want even more inspiration? Follow me on Instagram, Facebook, Pinterest, and Twitter. Here’s to a magical life!

Writing is like Cooking

Writing is messy, messy work.  And the mess is half the fun.  

It's a lot like cooking that way. Think of it as this alchemical process of mixing ingredients (one-half cup of a dream, a fourth of cup of memories beginning to fade, a pinch of cheekiness, a tablespoon of sweat, and a rounded cup of time); spices (one saucy phrase, a heaping teaspoon of innuendo, a sprinkle of read-between-the-lines); equipment (saucepans and spatulas, fingers and keyboards); and of course, timing. You cannot make a respectable beef bourguignon in less than four hours, nor skip on the loving task of first searing your beef cubes and sautéing your mushrooms, carrots, celery, and onions before adding them to the stew.  

So too with writing.  Sure you can put words on paper. Many of them all at once.  But they do not come together to form a cohesive whole--that story come to life on the page--unless you have tenderly cared for them in batches and slowly added them to your alphabet soup.  

The spices are a different matter altogether--too much of one and you've lost your dish to the ever aggressive nutmeg or your prose to the temptation of alliteration.  Not enough spice and you have a meal as thin and unappetizing as gruel or underdeveloped backstories.  

This is nothing to say of the most potent and mercurial of ingredients: your energy.  The love and time and essence you pour into what you create.  There is no accounting for the tasteless feast you slaved over all day, following the recipe exactly, or the accidental perfection that comes from a few minutes of hastily throwing pantry odds and ends into a bowl.   Similarly, you can spend forever on a piece of work and it still feels as dry as burnt toast.  Or you can simply trust the hours you have lingered in the kitchen or at your writing desk and let the words come to you of their own accord, ready to make their mark on the page and produce nothing short of a miracle.

And like any dish, the final product (if such a thing exists) is built in layers, over time, and refined by practice (that word to encompass each and every kitchen disaster from the undercooked flan to the overcooked dhal).  Each limp string bean, a product of over-boiling, and each burnt salmon are lessons in balance as is each typo, each half-formed paragraph or each experimental tone that made it no farther than the compost.  Yet if we never risk a deflated soufflé or flaccid prose, we lose out on the potential for a perfectly risen confection of air, chocolate, and whimsy. The enthusiastic over-use of cumin and the semi-colon (or parenthetical asides) eventually lead to a healthy respect for using both in moderation.

All of this is by way of saying that writing is in the rewriting, just as knowing your way around the kitchen is cooking and recooking specific dishes and attempting new ones.  Once you have a recipe down, you must go back and refine it as you learn more about your ingredients and are yourself seasoned by life experience.  That is why this year, you'll find me marinating on the messiness--the beautiful, delightful, challenging messiness--of writing and rewriting my thoughts on the magic of everyday life. 

Enchantment Learning & Living is an inspirational blog celebrating life’s simple pleasures, everyday mysticism, and delectable recipes that are guaranteed to stir the kitchen witch in you. If you enjoyed what you just read and believe that true magic is in the everyday, subscribe to my newsletter below for regular doses of enchantment. Want even more inspiration? Follow me on Instagram, Facebook, Pinterest, and Twitter. Here’s to a magical life!

Biscochito Coffee

Nothing says the holidays in New Mexico like a fresh batch of biscochitos.  I look forward to those anise dotted sugar cookies every year.  In fact, it's pretty much the only time I eat those treats, so each bite seems laced with memories of unwrapping presents and lingering over cups of tea by the fireside. 

Another way to enjoy that biscochito flavor throughout the holiday season is to lace your coffee with the anise seeds, something my family has been doing for years to add to the festive quotient of our morning cup of cheer. The fun in making you own holiday coffee blends is that you can create your own flavors (hello pumpkin spice and Aztec mocha coffees) and control the quality of ingredient.  Most commercial flavored coffees are made with artificial ingredients and poor quality beans--yuck!   You can also play with the strength of your flavors, from just a kiss of anise flavor in each sip to tasting the equivalent of one biscochito in each cup.

Don't forget to use good quality coffee here. I go for the Santa Fe-based Aroma Coffee's organic Black Lighting dark roast.  Seriously, it has ruined me for other coffee.  Once you try the good stuff, you can't go back to the so-so.  This is an excellent last-minute gift as well since the prep work is virtually nada (you can keep the beans whole or grind them) and everyone appreciates a tasty beverage high on the festive quotient, but a welcome break from the heavier eggnogs and hot chocolates.

Ingredients:

12 oz quality coffee

2 oz anise seeds

Mix ingredients together and store in an airtight container.  You can grind your coffee right away before mixing, or grind as you go with each pot you brew.  Just make sure to get some anise in each batch you grind as it might settle to the bottom of your container.  Don't hesitate to play with the proportions to find the perfect balance between coffee and spice for you.  Brew as you normally would.  Enjoy!

Enchantment Learning & Living is an inspirational blog celebrating life’s simple pleasures, everyday mysticism, and delectable recipes that are guaranteed to stir the kitchen witch in you. If you enjoyed what you just read and believe that true magic is in the everyday, subscribe to my newsletter below for regular doses of enchantment. Want even more inspiration? Follow me on Instagram, Facebook, Pinterest, and Twitter. Here’s to a magical life!

Lavender Blue Corn Soap

For my latest entry in my kitchen gifts series, I decided to whip up a batch of lavender blue corn soap.  This is the perfect gift for anyone who is not necessarily a big fan of the more seasonal soaps like my orange spice, peppermint hot chocolate, or pine and charcoal soaps (as if such a person actually existed...seriously, who doesn't love the warming scents of winter?).  It's also an ideal gift for people to enjoy long after the holiday is gone; once all the other festive treats have been used, they can turn to this soap and the promise of spring.

Okay, I admit it: I got the idea for this soap after my favorite doughnut, a sinful blend of lavender and blue corn made by a local bakery.  Blue corn has always struck me as a very New Mexican ingredient, so this soap always makes me feel like I'm gifting a little bit of the Southwest magic I live in.  You can, of course, always substitute regular cornmeal if you can't find the blue kind.  You don't have to get fancy with molds, either.  You can simply use a muffin tin unless you want to get playful with your molds like I did with the soaps pictured.

For this recipe, I use a natural shea butter melt and pour soap base which I got here (remember how I like to keep my crafting simple?  Well, a melt and pour solution gives you the fun factor of making your own soap without the more labor intensive and tricky ingredients like lye to work with).  Make sure to buy the suspension formula for your soap base so that the blue corn is evenly spread out in your soap rather than sinking to the bottom.  The lavender oil is an excellent antibacterial agent and nerve tonic, while the blue corn acts as a gentle exfoliate perfect for everyday use.

Ingredients:

16 ounces (1 lb) shea butter soap base

1/2 cup blue corn

100 drops lavender essential oil

Chop shea butter soap base into half-inch chunks and place in a microwave-safe bowl.  Heat for one minute and stir.  Then continue to melt base in the microwave in 20-second increments, stirring between each heating until liquefied, about 5 minutes.  Once the soap is melted stir in essential oils and blue corn.  Pour into muffin tins (or other molds) and allow to set, about an hour.  (You can speed this up by placing them in the fridge for about 20 minutes.)  Remove soap from molds by gently inserting a butter knife around the edges of the muffin tin until the soap pops out.  Wrap individually in parchment paper or tuck multiples in an airtight container.  Store in a cool, dry place indefinitely.  Makes about 6 small soaps or 4 medium sized ones.  Enjoy!

Enchantment Learning & Living is an inspirational blog celebrating life’s simple pleasures, everyday mysticism, and delectable recipes that are guaranteed to stir the kitchen witch in you. If you enjoyed what you just read and believe that true magic is in the everyday, subscribe to my newsletter below for regular doses of enchantment. Want even more inspiration? Follow me on Instagram, Facebook, Pinterest, and Twitter. Here’s to a magical life!

Honey Caramel Apples

image.jpg

Every fall I get this craving for caramel apples.  They are the quintessential autumnal treat, a perfect blend of tart, crisp fruit, chewy sweet caramel, and--if you like a little extra flash--crunchy nuts.  While I do have the perfect neighborhood spot to get caramel apples, I've always wanted to make my own. 

I've tried my hand at homemade caramel apples several times over the years but had the kind of issues I now know are common among first time caramel apple makers.  The caramel would either be so soft that it would slide right off the apples or too hard, making it difficult to bite into.  Of course, there were other issues only hippy clean-eating cooks like myself were concerned with, like not using corn syrup or having too many ingredients to count.  So there I was, ready to give up the pursuit of a perfect homemade caramel apple when I saw this delightful recipe from 101 Cookbooks (thank you Pinterest!).  My taste buds are already looking forward to another batch of these honey kissed caramel apples. 

This recipe has everything I was looking for: quality ingredients, foolproof instructions, and perfectly chewy caramel that stays on the apple.  Best of all?  It only takes three ingredients: honey, cream, and salt.  I usually make the salt optional in my recipes but find it works well here to balance the sweetness of the honey.  You can also add a little more to give your dessert a stronger salted caramel flavor.  Always use local honey for best quality and taste.  You can even experiment with types of honey to get different flavors.  The darker the honey, the more intense the honey flavor will be.  I like to use small local apples because they make the perfect single serving and you can't beat the flavor.  Feel free to use bigger ones so long as you stick with tart Granny Smiths.

The only sort of fancy tool you need is a candy thermometer, which you can buy super cheap at most grocery stores.  I found that keeping track of the temperature really does matter when making the caramel.  Too low a temp and you have runny caramel (great for ice cream, but not apples); too hot, the caramel become brittle.  You'll want to stick pretty close to the instructions on this one, unlike my other recipes when you have more wiggle room to adapt to your own tastes.  The creative part comes at the end when you can add nuts (I used sunflower seeds, pictured here), chocolate drizzles or other toppings to your apples.

image.jpg

Ingredients:

5-10 apples, washed and dried

1 cup heavy cream

1 cup honey

1/2 tsp sea salt

Line a baking sheet with parchment paper.  Push a popsicle stick into the top of each apple.  Fill a large bowl 1/2 full with ice water and set aside.

In a saucepan, heat the cream and salt until bubbly--not quite a simmer.  Add honey.  Bring the mixture to a boil. Reduce the heat to a simmer and stir constantly for about 15-20 minutes or until the mixture reaches about 255-260F degrees (this is where the thermometer comes in handy; just latch it to the side of your saucepan). To stop the caramel from cooking, carefully set the bottom of the saucepan in the bowl of cold water you prepared earlier.  Make sure not to get any of the water in the caramel. Keeping stirring until caramel thickens.  (You can always put the caramel back on the stove for a few seconds if it gets too thick, but I found it needed to be really chilled and thick for it to stick to the apples.)

Tilt saucepan so all the caramel goes to one side and dunk each apple into the cooling caramel until fully coated.  Place each apple on the parchment lined baking sheets and allow the caramel to cool and set at least 20 minutes.  When it is almost set (wait at least 10 minutes), you can add extra toppings.

Makes 5-10.  Enjoy!

Enchantment Learning & Living is an inspirational blog celebrating life’s simple pleasures, everyday mysticism, and delectable recipes that are guaranteed to stir the kitchen witch in you. If you enjoyed what you just read and believe that true magic is in the everyday, subscribe to my newsletter below for regular doses of enchantment. Want even more inspiration? Follow me on Instagram, Facebook, Pinterest, and Twitter. Here’s to a magical life!

Tomato, Tomatillo & Goat Cheese Tart

image.jpg

There is no such thing as too many tomatoes in my opinion--at least not during the long hot days of summer when these juicy fruits are in their prime. 

This recipe is a riff on both my calabicatas tart (once you have a good tart crust you can fill it with just about anything) and a goat cheese tomato tart we used to make as kids when we wanted to look like culinary pros and beat the heat with an easy one dish meal.  I've added tomatillos as an extra twist along with some pepper; both bring an unexpected spice and tartness to the dish.  That said if all you have on hand is tomatoes then, by all means, stick with the classic version of just tomatoes, onions, and goat cheese.

And speaking of goat cheese, you'll notice that I gave you a range of ounces to use in this recipe; if you want gooey-cheesy use more cheese. If you want it to just to play backup singer to the tomatoes, use less.  This dish is excellent on its own or paired with a side salad for dinner, and it makes a great left-over lunch!

image.jpg

Ingredients:

For crust:

1/2 cup blue cornmeal

1/2 cup whole wheat flour

1/2 cup white flour

1/3 cup olive oil

1/3 cup water

For filling:

2 medium tomatoes

6 tomatillos

3-5 oz goat cheese

1 medium sweet onion

1 tablespoon oregano

Pepper to taste

Salt to taste

Olive oil

Preheat oven 350 degrees.  Whisk together flours and a pinch of salt to taste.  Then add oil and water and mix until a ball forms.  Press dough evenly into a tart pan (I use one with a removable bottom for easy serving), then use a fork to prick holes into the bottom.  Cook in oven for 30-35 minutes. Remove from heat and let cool.

While the tart crust cools, dice up onions and sauté in olive oil with half a tablespoon of your oregano and pepper in saucepan until softened.  Slice tomatoes and tomatillos into thin disks.  Once the crust and the onions have cooled, pour your onions on the bottom layer of the crust, then break chunks of your goat choose and layer it over them.  Sprinkle one-fourth of a tablespoon of oregano and a pinch of pepper over the cheese; then layer the tomatillo circles over that.  Lastly, layer your tomatoes, starting in the center and working your way out to the tart crust to give it a uniform look.  Sprinkle with the last of the oregano, some pepper and salt.  Drizzle top with olive oil.

Place tart in oven and cook 35-40 minutes until egg is set.  Let cool for at least ten minutes before serving.  Serves 4-8.  Enjoy!

Enchantment Learning & Living is an inspirational blog celebrating life’s simple pleasures, everyday mysticism, and delectable recipes that are guaranteed to stir the kitchen witch in you. If you enjoyed what you just read and believe that true magic is in the everyday, subscribe to my newsletter below for regular doses of enchantment. Want even more inspiration? Follow me on Instagram, Facebook, Pinterest, and Twitter. Here’s to a magical life!

Mango Chile Lime Popsicles

As you know, I've been trying to beat the heat this week in a number of ways: avoiding the outdoors during the hottest midday hours, sipping cooling beverages, nixing cooking on the stove, sticking my undies in the freezer...you name it!  Okay, maybe not the last one...although I did see Marilyn Monroe do it in The Seven Year Itch to beat the sweltering heat of a New York City summer.  Fortunately for me, things are not quite so dire in the arid Southwest. 

I am, however, more than happy to indulge in these healthy mango chile lime popsicles to keep cool.  Like my pina colada popsicles, I use quality organic ingredients to whip up a tasty frozen treat that has way less sugars than your average store-bought popsicle--and those only natural at that.  All you need is your own popsicle molds to get started.  

These popsicles are a riff on the popular Mexican snack featuring mangoes sprinkled with chile, salt, and lime.  I remember eating mango chile suckers as a child too; there is something perfect about that blend of sweet fruit dusted with spicy chile powder that makes my mouth water just thinking about it.  (And yes, I write 'chile' with an 'e' and not an 'i' because I'm a New Mexican and that's how we spell it...but that's another story for another time!)

I've added an extra twist to this union by using Korean chile paste instead of chile powder.  The result is a sweet, smokey kick at the back of your throat--but be careful, because the heat of this chile sneaks up on you.  I put a little too much chile in my first batch, thinking it would be more sweet than hot.  Wow were we surprised at the spiciness!  With a little tinkering, I finally found the right balance of heat and sweet.  That said, if you like it hot, make it hotter...just go a little at time and sample frequently until you find your right balance.

Ingredients:

2 cups frozen mango chunks

1/2 cup fresh squeezed lime juice

3/4 cup water

1 tsp Korean chile paste

Puree ingredients in a blender until smooth.  Pour mixture into popsicle molds and let sit in freezer for at least two hours or until frozen.  I usually make them a day ahead and let them set overnight.  Let the treats sit on the counter for five to ten minutes and then remove them from the mold.  Eat immediately, with gusto!  Makes about 6 with a little left over for a mango smoothie, tequila optional.

Enchantment Learning & Living is an inspirational blog celebrating life’s simple pleasures, everyday mysticism, and delectable recipes that are guaranteed to stir the kitchen witch in you. If you enjoyed what you just read and believe that true magic is in the everyday, subscribe to my newsletter below for regular doses of enchantment. Want even more inspiration? Follow me on Instagram, Facebook, Pinterest, and Twitter. Here’s to a magical life!

Pina Colada Popsicles

So it's hot out.  Like, really hot.  As in 100 degrees hot!  Normally I love the desert summer, but I've found myself beginning to wilt in this heat.  Forget cooking anything that involves the oven or even the stove for that matter.  And you won't catch me baking under the midday sun.  Most of my time is now spent finding ways to stay cool in the midst of this heat wave.  Luckily, I have a perfect antidote to Albuquerque when it sizzles: these pina colada popsicles.  Yum!

They are reminiscent of carefree days on the beach, sipping that rum-soaked pineapple and coconut concoction finished off with a little umbrella...only better because I use only healthy ingredients in this recipe.  I swap out super sugary coconut cream with coconut milk and coconut water and use frozen pineapple for that pop of fruity goodness. What's more, these are super easy to make!  All you need is a popsicle mold which you can find here or at your local cooking store (and sometimes even at your supermarket). 

As with my other recipes, I use only organic ingredients for maximum healthy benefits and best-tasting results.  Make sure to use canned coconut; the taste is richer than the carton variety--and don't be alarmed if the coconut cream is solid at the top of the can.  It mixes easily with the liquid part on the bottom once you stir it up. It would also be a good idea to whip up a double batch of these popsicles because when the temperature goes up, they go fast! 

Ingredients:

1 cup coconut milk

1 cup coconut water

 1 1/2 cups frozen pineapples

1 ripe banana

Puree ingredients in a blender until smooth.  Pour mixture into popsicle molds and let sit in freezer for at least two hours or until frozen.  I usually make them a day ahead and let them set overnight.  Let the treats sit on the counter for five to ten minutes and then remove them from the mold.  Eat immediately, with gusto!  Makes about 6 with a little left over for a pina colada smoothie, rum optional.

Enchantment Learning & Living is an inspirational blog celebrating life’s simple pleasures, everyday mysticism, and delectable recipes that are guaranteed to stir the kitchen witch in you. If you enjoyed what you just read and believe that true magic is in the everyday, subscribe to my newsletter below for regular doses of enchantment. Want even more inspiration? Follow me on Instagram, Facebook, Pinterest, and Twitter. Here’s to a magical life!

Fried Sage Chips

One of my go-to appetizers come the weekend are these delicious and easy to make sage chips.  They combine my love of fresh herbs with all the tastiness of a kale chip but are dainty enough to nibble on as you enjoy an evening cocktail. I even hesitate to use the word "fried" in my blog title because these chips aren't greasy or heavy, just light and crisp.

There is nothing like the woodsy taste of the sage paired with the pop of sea salt on the tongue to prepare your palate for your evening meal.  It's the taste of this dish and taking the time to enjoy a pre-dinner drink that matters, rather than filling up on a heartier snack--it's like the Italian version of an appetizer in that way, making you slow down and enjoy the simple pleasure of a luxurious dinner.   Like my roasted garlic scapes, these sage chips only require good olive oil and sea salt to make them tasty--you can always add a pop of brightness to them with my 3 Citrus Himalayan Salt.

Ingredients:

1 bunch organic sage leaves

Olive oil

Sea salt

In a saucepan, heat olive oil on medium heat.  Use only enough olive oil to thinly coat the bottom of the pan, about 2-3 tablespoons.  Once oil is hot, place sage leaves in pan and let fry until they begin to get crispy and golden, but not burned (about one minute).  Make sure not to pile too many leaves into the oil at once, otherwise they will get mushy.  You may have to fry them in batches.  Promptly remove from heat and set on paper towel to drain.  While the leaves are still hot, sprinkle them with sea salt.  Serve immediately.  Enjoy!

Enchantment Learning & Living is an inspirational blog celebrating life’s simple pleasures, everyday mysticism, and delectable recipes that are guaranteed to stir the kitchen witch in you. If you enjoyed what you just read and believe that true magic is in the everyday, subscribe to my newsletter below for regular doses of enchantment. Want even more inspiration? Follow me on Instagram, Facebook, Pinterest, and Twitter. Here’s to a magical life!

Roasted Garlic Scapes

Imagine my delight to find garlic scapes at the farmers' market this weekend!  Here I had thought that the season for these tender shoots had come and gone without me being able to feast on these perfect greens (I comforted myself with an unexpected batch of fiddlehead ferns).  For those of you that don't know, scapes are the flower stalk of the garlic plant that are harvested before they flower so the plant sends its energy into developing the garlic bulb.  Picked early in the season, they have a mild garlic taste with hints of earthy asparagus.  Yum!

Typically, I indulge in this magical season by feasting on roasted garlic scapes.  I like to roast them for a long time so that they are one part meltingly tender and another part garlic crisps.  The great thing about scapes is that they don't need much to make a tasty appetizer.  In fact, I only ever use olive oil and quality salt.  If I feel like getting fancy, I sprinkle some of my 3 Citrus Himalayan Salt over the curled greens. 

You'll notice that I didn't specify quantities here.  I roast as little as a handful to a whole basketful depending on how many people I'm serving, so the recipe is pretty versatile.  Just remember that the more scapes you use, the longer you want to roast them--especially if you want them slightly crispy.

Raw scapes ready for roasting.

Raw scapes ready for roasting.

Ingredients:

Garlic Scapes

Olive Oil

Sea Salt

Preheat oven 350 degrees.  Place washed scapes on one side of a large sheet of foil and sprinkle with olive oil and salt.  Fold other half of foil over the scapes and pinch the open sides closed so that you create a little pouch for the scapes to cook in.  Place on a baking sheet and let roast in over for 30 minutes to an hour.  Remember, the longer you cook them, the crispier they get, so cook they according to your own preference.  Let cool for five minutes before plating.  Enjoy!

Enchantment Learning & Living is an inspirational blog celebrating life’s simple pleasures, everyday mysticism, and delectable recipes that are guaranteed to stir the kitchen witch in you. If you enjoyed what you just read and believe that true magic is in the everyday, subscribe to my newsletter below for regular doses of enchantment. Want even more inspiration? Follow me on Instagram, Facebook, Pinterest, and Twitter. Here’s to a magical life!

Naked Margarita

Margaritas are one of the most festive summer drinks--and the ones most susceptible to too many sugar-laden ingredients.  In reality, all a great margarita needs is a few things: good tequila, juicy limes, a dash of sweetness, and a handful of ice.  If you want to get carried away, you can rim your glass with salt, but I never do. 

With this in mind, I present to you my naked margarita, stripped from the overly-sweet triple sec or other frou-frou ingredients, so that you taste nothing but the sweet burn of tequila and lime on your tongue. I like to make mine using agave syrup.  But If I'm in a pinch, I've been known to use my stevia herb simple syrup or actual simple syrup (recipe found here--just omit the ginger, or keep it for an extra kick!).  Play around with the sweetness factor.  I like to taste the tartness of the lime more than the sweet, so if you like a sweeter drink, by all means, add more simple syrup. Look for tequila that is 100% agave; the other stuff is full of more additives and fake coloring than actual tequila.  And please, please, please use fresh organic limes--they make all the difference in the world.

Ingredients:

1 oz fresh lime juice

2 oz tequila

1/2 oz agave nectar

ice

Combine ingredients in a shaker and shake thoroughly until ice begins to melt, about 30 seconds.  Strain into chilled glass.  Garnish with a lime if desired.  Makes one serving.  Feel free to be as naked as your margarita while you drink it.  Enjoy!

Enchantment Learning & Living is an inspirational blog celebrating life’s simple pleasures, everyday mysticism, and delectable recipes that are guaranteed to stir the kitchen witch in you. If you enjoyed what you just read and believe that true magic is in the everyday, subscribe to my newsletter below for regular doses of enchantment. Want even more inspiration? Follow me on Instagram, Facebook, Pinterest, and Twitter. Here’s to a magical life!

Stevia Herb Simple Syrup

So I know claiming to have a sugar free simple syrup recipe to share sounds too good to be true--or full of those chemical-laden alternative sugars that are way worse for you than any spoonful of the sweet stuff.  This recipe, however, is really as good as it sounds and perfect for someone like me who doesn't enjoy a lot of sugar.  

I used dried stevia leaves to make what is essentially a thick tea aka my simple syrup.  Stevia is a herb with naturally sweet leaves.  You may be familiar with it in the shape of little sugar packets which in my opinion don't taste as good as the real deal because they only use the extract, not the whole leaf.  Plus, stevia leaves are easy to find at your local herb store or online here.  It gives you all the sweetness of sugar without the calories.

I particularly love to use this in lemonade so I can enjoy lots of this perfect summertime drink without worrying about sugar overload.  It's also great in margaritas or other drinks that require a little sugar to balance out the tartness of citrus.  Be warned though, some say that one tablespoon of dried stevia is the equivalent of one cup of sugar in sweetness--so a little really does go a long way!  Some people prefer to grind up the leaves and sprinkle them into their recipes, but I prefer this tea-like steep because it is less messy for mixing and easy to have on hand.

Ingredients:

1/4 cup dried stevia leaves

1 cup boiling water

Pour hot water over herbs and let steep until mixture is cool.  Then pour liquid through a strainer into a mason jar.  Store for a few weeks in fridge.  Makes about 1 cup.  Enjoy!

image.jpg

Enchantment Learning & Living is an inspirational blog celebrating life’s simple pleasures, everyday mysticism, and delectable recipes that are guaranteed to stir the kitchen witch in you. If you enjoyed what you just read and believe that true magic is in the everyday, subscribe to my newsletter below for regular doses of enchantment. Want even more inspiration? Follow me on Instagram, Facebook, Pinterest, and Twitter. Here’s to a magical life!

Everything's Coming Up Roses Tea Blend

tea rose.jpg

This tea is like a cup-sized celebration of the bounty in your life, the eternal spring in your heart, and the perpetual enjoyment of love and life.  It is also a perfect February tea as it's laced with winter's warming spices yet heavily perfumed with roses--the promise of a new season.

I used two types of rose petals here; the soft pink ones give a light floral aroma while the red petals offer up an earthy flavor that pairs well with the black Assam tea.  Calendula lends a pop of color.  This tea is a thoughtful Valentine treat for the tea lover in your life that you love to love--try saying that three times fast--or for anyone who needs to be reminded that everything is, truly, coming up roses!

Ingredients:

1 cup Assam black tea

1/2 cup red rose petals

1/2 cup pink rose petals

1/2 cup cinnamon bark chips

1/4 cup calendula

1/8 cup cloves

Combine ingredients in bowl and transfer to a mason jar or other airtight container.  Store in a cool, dry place.  Makes almost 3 cups.  Enjoy!

Health benefits of ingredients:

Calendula: anti-inflammatory, aids digestion, reduces swollen lymph glands, soothes irritated skin.

Cinnamon: antiseptic, aids digestion, calms nervous system, anti-inflammatory.

Rose petals: soothes skin; mild sedative and natural stress reliever; rich in vitamin C.

Clove: antiseptic, antioxidant, aids digestion.

Enchantment Learning & Living is an inspirational blog celebrating life’s simple pleasures, everyday mysticism, and delectable recipes that are guaranteed to stir the kitchen witch in you. If you enjoyed what you just read and believe that true magic is in the everyday, subscribe to my newsletter below for regular doses of enchantment. Want even more inspiration? Follow me on Instagram, Facebook, Pinterest, and Twitter. Here’s to a magical life!

Aphrodite's Sugar Scrub

Valentine's Day is a celebration of the love in your life--and not just romantic kind.  It's about sharing your gratitude for the people who make your day a little brighter and a little sweeter.  What better way to honor this love than by giving them this sugar body scrub to shake off the winter blahs?

Full of cinnamon and roses--long considered natural love potions--this scrub inspires us to invoke the divine Aphrodite and to relish the simple hedonism of a long bubble bath (maybe with a buddy!), pampered skin, and a rosy outlook on life.  Pair it with my Aphrodite's Bath Salts, and you've got a match made in heaven!

Ingredients:

1 cup organic sugar

1 cup olive oil or coconut oil

1 tablespoon cinnamon

1/4 cup rose petals

30 drops cinnamon essential oil

30 drops rose oil or rose water

10 drops clove oil

Mix all ingredients in a bowl and store in a mason jar or other airtight container.  Makes about 1 cup.  Enjoy!

Enchantment Learning & Living is an inspirational blog celebrating life’s simple pleasures, everyday mysticism, and delectable recipes that are guaranteed to stir the kitchen witch in you. If you enjoyed what you just read and believe that true magic is in the everyday, subscribe to my newsletter below for regular doses of enchantment. Want even more inspiration? Follow me on Instagram, Facebook, Pinterest, and Twitter. Here’s to a magical life!

Aphrodite's Bath Salts

With Valentine's Day around the corner, you might be thinking about what to get for those special someones in your life beyond a glitter coated heart-shaped card, a box of chocolates, or a bouquet of roses--all wonderful, natch, but sometimes it doesn't hurt to shake things up.   And let's be honest, they've probably already used the treats you made them for the holidays! I like to think of Valentine's Day as a time when we can try a little tenderness, as the song goes.  That includes pampering the people that fill your corner of the world with love, light, and happiness. 

And who knows? If you want to treat an extra special someone to some TLC, the aphrodisiacs mixed into these bath salts might just make things a little more interesting.  The clove and cinnamon oil are antibacterial and add a warming energy to your bath, while the rose petals bring a touch of romantic glamor as well as skin-softening and toning qualities.  Adding rose oil and powdered cinnamon just takes this delectable soak over the top!

Ingredients:

1 cup Epsom salts

1/4 cup olive oil or coconut oil

1 tablespoon cinnamon

1/4 cup rose petals

30 drops cinnamon essential oil

30 drops rose oil or rose water

10 drops clove oil

Combine ingredients in a bowl until thoroughly mixed.  Store in an airtight container indefinitely.  Makes about 1 cup.  Enjoy!

Enchantment Learning & Living is an inspirational blog celebrating life’s simple pleasures, everyday mysticism, and delectable recipes that are guaranteed to stir the kitchen witch in you. If you enjoyed what you just read and believe that true magic is in the everyday, subscribe to my newsletter below for regular doses of enchantment. Want even more inspiration? Follow me on Instagram, Facebook, Pinterest, and Twitter. Here’s to a magical life!