Enchantment Learning & Living Blog

Welcome to Enchantment Learning & Living, the inspirational space where I write about the simple pleasures, radical self-care, and everyday magic that make life delicious.

DIY Ironing Spray Starch

I will be the first to admit that ironing is not always on my list of priorities.  As much as I love cleaning my house (and yes, I really *do* love it!), ironing is one of those things I always put off...so much so that I think I've only ever used my ironing board and iron maybe a dozen times in the past few years and only in dire need. 

Cut to me with a pile of dresses--absolutely adorable dresses, mind you--that I wanted to wear but hadn't because (you guessed it) they need to be ironed.  My default excuse was that I didn't have any starch to iron out all the wrinkles and smooth out the pleats of my clothes.  Then one day I bit the bullet and commit to an afternoon of ironing so that I could finally wear those dresses.  I even learned how to make my own spray starch so I wouldn't be tempted to put off my chore with my go-to excuse. 

Now here I am with a closet full of well-ironed clothes and a new addiction blooming: ironing!  Yes, it's true, I've fallen in love with the soothing routine and all because of making my own starch.  It is a simple mixture of cornstarch and water, but there is something about mixing up a batch (way cheaper and eco-friendlier than anything you'll get in the store) and spraying it across my wrinkled dresses feels so right.  Now I can't stop myself. 

And you should try it too.  All you need is a clean empty spray bottle and cornstarch, and you've got yourself a household miracle.  If you want a heavier starch, use more cornstarch--less, use less.  Use cold water here to keep cornstarch from clumping. 

Ingredients:

Heaping tablespoon cornstarch

1 pint cold water

Add ingredients to an empty spray bottle and shake well until cornstarch dissolves. Store in fridge.  Shake well before each use.  Enjoy wrinkle free clothes!

Enchantment Learning & Living is an inspirational blog celebrating life’s simple pleasures, everyday mysticism, and delectable recipes that are guaranteed to stir the kitchen witch in you. If you enjoyed what you just read and believe that true magic is in the everyday, subscribe to my newsletter below for regular doses of enchantment. Want even more inspiration? Follow me on Instagram, Facebook, Pinterest, and Twitter. Here’s to a magical life!

This Lady Needs Some Pampering Spa Kit

Oh yes, you know it sounds so right to be thinking of some lovely spa time right around Friday afternoon.  Sometimes a lady--or let's be honest, a gent--needs a little TLC and time to be pampered.  When you have the energy, it can be fun to have a home spa day, but sometimes even that feels like too much work and all you want is a gentle routine to help you transition from work to play.  So if you're looking for a way to kick off your weekend with a relaxing start, or just get some ideas for how to include a little more self-care during the week, check out my favorite end-of-the-week spa kit.  (And yes, I look exactly like the woman pictured to the right when I take a bubble bath, jewels and perfect hair and all.) 

1. Weekend Head Start Bubble Bath

2. Honey Face Mask

3. Hydrating Hair Mask

4. Lavender Foot Scrub

5. Women's Soothing Mint Tea

These recipes are made from simple ingredients found in your kitchen and pair well together for a total self-care experience.  The hair mask and face mask are perfect to try while you linger in a hot bath--which you should do since my Weekend Head Start Bubble Bath actually detoxes your system. After time spent drinking tea in the bath while letting these potions and lotions do their work, you will feel radiant and rejuvenated.  What bliss!

Enchantment Learning & Living is an inspirational blog celebrating life’s simple pleasures, everyday mysticism, and delectable recipes that are guaranteed to stir the kitchen witch in you. If you enjoyed what you just read and believe that true magic is in the everyday, subscribe to my newsletter below for regular doses of enchantment. Want even more inspiration? Follow me on Instagram, Facebook, Pinterest, and Twitter. Here’s to a magical life!

Tuna-less Mason Jar Nicoise Salad Recipe

IMG_5400.JPG

One of my favorite all time lunches is a well prepared Nicoise salad; it is elegant and well balanced, full of good-for-you fats, proteins, and veggies that leave you feeling light and energized.  Naturally, I set about figuring out how to transfer this dish into a quick mason jar meal for when I'm on the go. 

I made my version tuna-less because I often prefer vegetarian lunches.  You can, however, feel free to add tuna if you so wish.  After trial and error, I found that cherry tomatoes work best in this salad because they hold up better if you like to make your mason jar meals ahead of time like I do.  But if you are making your salad the morning of, chopped tomatoes, pictured here, work just as well.

Ingredients:

2 cups boiled small potatoes, halved

2 cups chopped green beans

1 cup chopped radishes (about 8 big radishes)

1 cup kalamata olives

2 tomatoes, cut into chunks or 1 cup cherry tomatoes, left whole

4 hard-boiled eggs, cut into quarters

1/2 cup apple cider vinegar

1/2 cup extra virgin olive oil

1 heaping tablespoon Dijon mustard

Combine vinegar, oil, and mustard in a mason jar and shake until combined.  Then divide this dressing between 4 mason jars.  Starting with the potatoes, evenly layer ingredients into each jar in the order they appear on the ingredient list.  Store in the fridge.  To serve, simply shake the jar until dressing coats all layers and enjoy!  Makes 4 servings. 

Enchantment Learning & Living is an inspirational blog celebrating life’s simple pleasures, everyday mysticism, and delectable recipes that are guaranteed to stir the kitchen witch in you. If you enjoyed what you just read and believe that true magic is in the everyday, subscribe to my newsletter below for regular doses of enchantment. Want even more inspiration? Follow me on Instagram, Facebook, Pinterest, and Twitter. Here’s to a magical life!

A Celebration of Kitchen Magic in 5 Flash Essays!

There is something almost ephemeral about the magic that is conjured over a simmering pot of beans or a shallow pan slowly melting butter for ghee.  Somewhere between rinsing and sifting the beans and the hours they spend cooking on a hot stove--or the brief moments it takes for your melted butter to separate its contents--magic occurs.  It is in the way tinkering in the kitchen can sooth us and in how we nourish ourselves not just by the food we make but how we make it. A pinch of this.  A dash of that.  Food is intention, a pure embodiment of how we chose to live, heal, nourish, love.

In many ways, the kitchen is also the most intimate space in our home; it reveals everything about us, from what we consider essential to our everyday life to how we connect with family and those we love.  In honor of this kitchen magic that keeps pulling me back to my stove, a new recipe, or a fresh kettle of hot water, I present to you five musing on the wonder and healing energy of the kitchen:

1.  Under the Influence of M.F. K. Fisher

2.  On Baking

3.  On Grocery Lists

4.  On Cooking and Onion

5.  On Cooking Dinner

What do you love most about the kitchen?

Enchantment Learning & Living is an inspirational blog celebrating life’s simple pleasures, everyday mysticism, and delectable recipes that are guaranteed to stir the kitchen witch in you. If you enjoyed what you just read and believe that true magic is in the everyday, subscribe to my newsletter below for regular doses of enchantment. Want even more inspiration? Follow me on Instagram, Facebook, Pinterest, and Twitter. Here’s to a magical life!

Peaches & Cream Overnight Porridge

Right now I'm trying to make the most of peaches as their season is slowly winding towards its end.   Especially come September, much of the peaches you can find at the markets are ripe and juicy--in some cases, verging on overripe.  Not to fear!  These almost overripe jewels are perfect for this Peaches & Cream Overnight Porridge because their juices mingle with the yogurt and milk creating a decadent treat for your breakfast.  The chia seeds and almond meal add an extra vitamin boost.  Like my Tropical Breakfast Quinoa or my Tulsi-rose Breakfast Quinoa, this dish translates well into a breakfast mason jar meal.  In fact, I often prepare this porridge by serving it up in my mason jars straight from the fridge.

What makes this dish so simple--easier even than my quinoa recipes--is that you simply stir all the ingredients together and let them sit overnight in your fridge.  Then the next morning, you have a perfect jar of oats ready and waiting for you.  I especially love this meal when I find myself strapped for time come Sunday and can't linger in the kitchen as I prepare my weekly breakfast and lunch. 

Ingredients:

1 cup multi-grain oats

2 tablespoons chia seeds

2 tablespoons almond meal

2 tablespoons flax seed meal

1 teaspoon cinnamon

1/2 teaspoon ginger

3 tablespoons maple syrup or honey

1 teaspoon vanilla extract

1 cup milk

1 cup Greek yogurt

4 peaches, chopped

Mix all dry ingredients together in a bowl and set aside.  In a separate bowl, mix together all the wet ingredients until combined.  Then begin to add wet ingredients to the dry ingredients slowly, until thoroughly mixed.  Finally, stir in peach chunks.  Divide mixture evenly between 4 mason jars and let sit overnight in fridge.  Makes 4 servings.  Enjoy!

Enchantment Learning & Living is an inspirational blog celebrating life’s simple pleasures, everyday mysticism, and delectable recipes that are guaranteed to stir the kitchen witch in you. If you enjoyed what you just read and believe that true magic is in the everyday, subscribe to my newsletter below for regular doses of enchantment. Want even more inspiration? Follow me on Instagram, Facebook, Pinterest, and Twitter. Here’s to a magical life!

On Peeling Chile

roatingchiles.png

It is a yearly ritual, one that closes out summer and ushers in fall; it's as synonymous with your beloved New Mexico as red chile ristras and open turquoises skies: chile peeling.  That art of gathering, roasting and then peeling giant sackfuls of your native fruit to store for the rest of the year.  Every family has their own way; every family knows that their way is the best.

For you, chile peeling is always done on a series of Fridays, when you can devote a few hours to talking, drinking beer or tea--or tequila, and peeling, always peeling the hot, charred skin off the flesh of the roasted chiles and separating them into two bowls: the broken chiles for stews and salsas, and the unblemished whole peppers for rellenos (that dish perfect in the way it stuffs your chiles with cheese, smothers them in blue corn batter, and fries them up).  The waiting-to-be-peeled chile sits in sacks, cooling on your kitchen counter.

peeled.jpg

Chile peeling.  Your hands tingle from the heat of the peppers long after you've stored your last bag in the freezer.  The pot of beans cooks on the stove top as you work, the promise of celebratory homemade tortillas and rellenos to feast on afterward.  The cool splash of a micro-brew on your tongue, the taste of your homeland.  It is a mediation and an art, flooding you with memories of working with your mother in this very kitchen peeling, planning, preparing a year's worth of chile, a year's worth of countless family dinners, a year's worth of new history laid into the grooves of your lives.

Enchantment Learning & Living is an inspirational blog celebrating life’s simple pleasures, everyday mysticism, and delectable recipes that are guaranteed to stir the kitchen witch in you. If you enjoyed what you just read and believe that true magic is in the everyday, subscribe to my newsletter below for regular doses of enchantment. Want even more inspiration? Follow me on Instagram, Facebook, Pinterest, and Twitter. Here’s to a magical life!

Mason Jar Spinach Salad

Spinach is one of those leafy greens that I crave deep in my bones.  More than kale or chard, I simply cannot have enough spinach!  This mason jar salad is an ode to that and stuffed with other good-for you veggies and nuts.  I added a little Dijon mustard to the dressing and its tang ties all the ingredients together--from the sweet, smokey tomatoes to the sugary peas to the peppery radishes. Don't worry if you feel like you are stuffing the spinach leaves into the jar at the end--they'll be fine; you just want to make sure to pack that jar with as many yummy veggies as you can.

Ingredients:

1 cup extra firm tofu, chopped

2 cups sundried tomatoes, diced

1 cup radishes, sliced

1 cup sugar snap peas, diced

4 cups spinach

1 cup pepitas

1/4 cup apple cider vinegar

1/3 cup extra virgin voile oil

1 tablespoon Dijon mustard

salt to taste (optional)

Combine apple cider vinegar, olive oil, mustard, and salt if desired in a small mason jar and shake until combined.  Divide dressing between four mason jars evenly.  Then proceed to layer each ingredient evenly between 4 mason jars, starting with the tofu and ending with the spinach. Store in the fridge.  When you're ready for your mason jar meal, simply shake the jar to spread the dressing around.  You can eat straight from the jar or pour it on a plate.  Makes 4 servings.  Enjoy!

Enchantment Learning & Living is an inspirational blog celebrating life’s simple pleasures, everyday mysticism, and delectable recipes that are guaranteed to stir the kitchen witch in you. If you enjoyed what you just read and believe that true magic is in the everyday, subscribe to my newsletter below for regular doses of enchantment. Want even more inspiration? Follow me on Instagram, Facebook, Pinterest, and Twitter. Here’s to a magical life!

Tropical Breakfast Quinoa

The last time I talked about quinoa for breakfast was when I introduced you to my Rose-Tulsi Breakfast Quinoa in the spring.  I love quinoa because it is so healthy for you and so versatile; I can apply any flavor to it and it works beautifully.  Take, for instance, my new breakfast love, the tropical breakfast quinoa that features coconut milk and almond meal to give this grain extra richness and pineapple for a pop of color and sweetness.  I finish it off with a dusting of coconut flakes.  Best of all, this meal is easy to turn into a mason jar meal simply by layering the quinoa and the pineapple in a mason jar.  

Ingredients:

2 cups water

1 cup quinoa

3 tablespoons honey (to taste) 

4 tablespoons almond meal

1 can coconut milk

2 cups pineapple chunks, fresh or frozen

1/2 cup coconut flakes

Heat to cups of water in a pot until boiling.  Add quinoa and cook on medium heat for approximately 15 minutes or until grains are soft.  Remove from heat and stir in almond meal until combined.  Then add honey and coconut milk, stirring until combined.  Don't worry if the coconut milk doesn't completely absorb into the quinoa right away.  You can serve this immediately by dividing it evenly between four bowls and topping it with pineapple chunks and coconut flakes.  Or if you want to make a mason jar breakfast out of it, simply allow it to cool completely before dividing it evenly between 4 mason jars and topping it with your fruit and coconut flakes.  Serves 4.  Enjoy!

Enchantment Learning & Living is an inspirational blog celebrating life’s simple pleasures, everyday mysticism, and delectable recipes that are guaranteed to stir the kitchen witch in you. If you enjoyed what you just read and believe that true magic is in the everyday, subscribe to my newsletter below for regular doses of enchantment. Want even more inspiration? Follow me on Instagram, Facebook, Pinterest, and Twitter. Here’s to a magical life!

Mason Jar Greek Salad

What better way to fuel up during the day than with another mason jar salad?  It's light, easy to fix, and super portable.  One of my favorite salads that I whip up is my riff on the Greek salad, minus the feta, although you can feel free to add some of this salty cheese to it if you want to.  The chickpeas give you plenty of protein while the olives have good-for-you fats and the veggies are chock-full of vitamins and minerals.  Best of all, this meal isn't heavy so you won't find yourself with a case of the post-lunch sleepies at work!

As with all mason jar meals, it's best to put the dressing on the bottom of the jar and then put the most durable item on top of the dressing, keeping the most fragile items away from the dressing until you shake it up.  This prevents mush salads or the need to store your dressing separately from your ingredients.

Ingredients:

2 cups cooked chickpeas

2 cups cherry tomatoes

1 cup calamata olives

1 cup chopped cucumber (about 1 medium cucumber)

1 cup chopped bell peppers

1/4 cup freshly squeezed lemon juice

1/3 cup extra virgin olive oil

salt to taste (optional)

Combine lemon juice, olive oil, and salt if desired in a small mason jar and shake until combined.  Divide dressing between four mason jars evenly.  Then place 1/4 cup chickpeas in each mason jar, followed by 1/8 cup bell peppers.  After that, add approximately 1/8 cup calamata olives and then 1/8 cup cucumbers on top of that.  Finally, add 1/4 cup cherry tomatoes.  Repeat the layering until ingredients are gone or jar is full.  Store in the fridge.  When you're ready for your mason jar meal, simply shake the jar to spread the dressing around.  You can eat straight from the jar or pour it on a plate.  Serves 4.  Enjoy!

Enchantment Learning & Living is an inspirational blog celebrating life’s simple pleasures, everyday mysticism, and delectable recipes that are guaranteed to stir the kitchen witch in you. If you enjoyed what you just read and believe that true magic is in the everyday, subscribe to my newsletter below for regular doses of enchantment. Want even more inspiration? Follow me on Instagram, Facebook, Pinterest, and Twitter. Here’s to a magical life!

Mason Jar Farmers' Market Salad

IMG_5381.JPG

It goes without saying that I am addicted to the farmers' market this time of year.  I almost feel like it's a sin to get my produce anywhere else; I mean, where would I find tomatoes that taste like sun-kissed heaven or little cucumbers just begging to be pickled?  Out of this love, stems my mason jar farmers market salad, perfect only this time of year when the produce speaks for itself and needs no more than a wash and a chop to be a divine meal. 

I find it an extra treat during the school year to have this salad for lunch because it reminds me of the lovely time I had gathering the ingredients the Saturday before and the wonderful time I will have the coming weekend gathering more ingredients to play with. The trick to this salad--and most of my mason jar meals--is to get as many different colors as possible into one jar--more colors equal more nutritional value in your meal.  You'll notice that I included the beet greens here--you can do the same for the radish leaves as well.  Just make sure that your greens are firm and unblemished, not mushy or wilted.  This salad is also pretty versatile--just mix together whatever veggies you were able to get from the farmers' market that week.  But below is my basic salad, the one I keep going back to rain or shine.

Ingredients:

2 cup chopped green or purple beans

1 cup sliced radishes

2 cup fresh corn

1 cup sliced beets

1 cup sliced beet greens

1/4 cup apple cider vinegar

1/3 cup extra virgin olive oil

salt to taste (optional)

Combine apple cider vinegar, olive oil, and salt if desired in a small mason jar and shake until combined.  Divide dressing between four mason jars evenly.  Then proceed to layer each ingredient evenly between 4 mason jars.  I like to start with the green beans or beets and then layer a different colored veggie and ending with my greens on top. Store in the fridge.  When you're ready for your mason jar meal, simply shake the jar to spread the dressing around.  You can eat straight from the jar or pour it on a plate.  Serves 4.  Enjoy!

Enchantment Learning & Living is an inspirational blog celebrating life’s simple pleasures, everyday mysticism, and delectable recipes that are guaranteed to stir the kitchen witch in you. If you enjoyed what you just read and believe that true magic is in the everyday, subscribe to my newsletter below for regular doses of enchantment. Want even more inspiration? Follow me on Instagram, Facebook, Pinterest, and Twitter. Here’s to a magical life!

Grilled Artichokes

Artichokes are one of those wondrous garden plants that make both beautiful purple flowers when in bloom and if you are willing to forgo the pleasures of that bright blossom, a delicious appetizer.  These vegetables seem finicky to people who have never cooked them but don't be thrown off by their prickly tips and thistled center.  They are actually very easy to cook! 

IMG_5334.JPG

Typically, when we think of an artichoke appetizer, we think of a veggie that had been boiled until soft and then dipped in butter or another sauce.  In the summer, I love to grill these veggies as a nice alternative to this dipping appetizer because, after being marinated and grilled, the need for a sauce is eliminated and grilling gives the artichoke a nice smokey flavor.  This is also a great make-ahead recipe.  I like to boil and marinate my artichokes, then bring them ready to grill tofamily Sunday dinner.  This may seem like a high-maintenance recipe (Trim? Boil? Marinate? THEN grill?), but you only really spend about 20 minutes work time and the rest is in the waiting for the veggie to boil and marinate. 

An easy way to trim artichokes is to simply slice 1-2 inches off the top of the artichoke.  This will take care of most of the thorny parts.  Then, using scissors, clip any of the remaining thorns.  You'll notice I used smaller artichokes for this recipe--not quite the super tiny ones, but the size of a tennis ball.  You can feel free to adapt this recipe for a larger artichoke or several extra-small ones, just make sure to adjust the boiling time accordingly (the bigger the artichoke, the longer the boiling time).  The marinade quantity stays the same.

Ingredients:

4 small artichokes

1/2 cup balsamic vinegar

1/2 cup extra virgin olive oil

2 cloves garlic, minced

1 tablespoon rosemary

salt to taste

Trim artichokes and place in a pot of boiling water.  Boil for approximately 40 minutes or until the leaves of artichokes pull off easily; I use a pair of tongs to test their readiness.  Remove artichokes from water and allow to cool for about 20 minutes.  Then slice artichokes in half and remove the inedible inner thistle. 

Place halved artichokes in a container and drizzle with olive oil, vinegar, garlic, herbs, and salt.  Let sit for at least an hour.  For best results, let sit overnight in the fridge and bring to room temperature before grilling.

Heat grill (either indoor or outdoor).  Place artichoke halves face down and grill for approximately 5 minutes or until they are a nice golden brown.  Flip and cook rounded side for another 5 minutes.  Remove from heat and serve immediately.  Serves 4-8.

Enchantment Learning & Living is an inspirational blog celebrating life’s simple pleasures, everyday mysticism, and delectable recipes that are guaranteed to stir the kitchen witch in you. If you enjoyed what you just read and believe that true magic is in the everyday, subscribe to my newsletter below for regular doses of enchantment. Want even more inspiration? Follow me on Instagram, Facebook, Pinterest, and Twitter. Here’s to a magical life!

Riceless Veggie Sushi

One of the best ways to end the week is with a little something different on your dinner plate.  Enter sushi.  Homemade sushi.  Wait!  Before you panic, know that making your own sushi is actually super easy (another reason this makes a great end-of-the-week meal) and doesn't require raw fish or anything fancier than some veggies and seaweed sheets, which you can find at your local health food store. 

I like to nix the rice in my sushi rolls, mostly because I think the best part of sushi is the veggies (and fish, if I'm ordering from a restaurant).  I also don't like a lot of carbs in my diet, and the rice part of sushi always makes this a heavier meal than I like it to be.  So, no rice for me which means easier prep.  If I want a little extra protein boost, I throw in extra-firm tofu strips I marinate in soy sauce and chile paste, but they aren't necessary to enjoying this healthy, quick meal. 

The only real trick to this light meal is learning how to properly fold your roll so that it doesn't fall apart when you slice it--we all remember how my first attempts went, right?  When I tried to make sushi for the first time, I overloaded my roll and didn't make it tight enough.  Now, I use less of each ingredient and leave empty space at either end of my seaweed sheet so that I can properly bind it with no mess.  It may take you some time to get the hang of it, but know that even if your first attempts end up a little messy, the meal is still tasty! 

Ingredients:

2 sushi nori seaweed sheets

1 avocado, thinly sliced

1 carrot, shredded

2 radishes, thinly sliced

4 dandelion or radish leaves

4 green beans (optional)

2 thin slices tofu, cut into strips (optional)

1 teaspoon chile paste (optional, as tofu flavoring)

1 teaspoon low sodium soy sauce (optional, as tofu flavoring)

Wasabi and low sodium soy sauce for dipping

Drizzle tofu slices with soy sauce and chile paste and set aside.  Place one seaweed sheet on the bamboo mat.  Line it with half of the avocado slices, starting 1/2 inch of the way in and leave at least 2 inches at the opposite end.  Then line the avocados with half of the radish slices and then half of the carrot shreds.  Place two leaves of the greens in the center of that mix and two green beans across them if you are using them.  Finally, add the tofu in strips across the center. 

IMG_5164.JPG

Then, slowly roll the sushi sheet, making sure that it is tight and holding all the veggies together as you go.  When you have reached the last 1-inch strip, rub a little water over this lip and press it against the rest of the rolled sushi sheet to bind your roll.  Cut into even slices.  Repeat, using the last of the ingredients to make a second roll.  Serves 2.  Enjoy!

Enchantment Learning & Living is an inspirational blog celebrating life’s simple pleasures, everyday mysticism, and delectable recipes that are guaranteed to stir the kitchen witch in you. If you enjoyed what you just read and believe that true magic is in the everyday, subscribe to my newsletter below for regular doses of enchantment. Want even more inspiration? Follow me on Instagram, Facebook, Pinterest, and Twitter. Here’s to a magical life!

Spicy Okra Fries

Okra is one of those fruits that I only ever eat when I can get it at the farmers market. I love gathering rich purple and green spears to use in stir fries, to pickle, and to make into fries that are juicy on the inside and crisp on the outside.  They taste all the more magical because their season is so short.  Now is the time to stock up on the delectable treats and enjoy them any way you can. 

This year, I dabbled in a new recipe, eager to put together my New Mexican love of red chile and blue corn with these okra spears, a nice blend of crisp outsides and gooey insides.  Thus, my spicy okra fries were born.  They pair well with my aioli and work beautifully as a side dish or appetizer.

Ingredients:

1/2 pound okra

1/8 cup flour

1/8 blue corn flour

1/8 breadcrumbs

1/8 cup nutritional yeast

1 tablespoon red chile powder

salt to taste

2 eggs, beaten

Preheat oven 400 degrees.  Slice okra spears in half.  Combine dried ingredients in a shallow bowl.  Place beaten eggs in another shallow bowl.  Working a few spear halves at a time, dip halves into eggs and then into the flour mix.  Line battered halves on an unlined baking sheet. Cook okra spears 25 minutes at 400 degrees, making sure to turn them once halfway through. Serves 2-4.  Enjoy!

Enchantment Learning & Living is an inspirational blog celebrating life’s simple pleasures, everyday mysticism, and delectable recipes that are guaranteed to stir the kitchen witch in you. If you enjoyed what you just read and believe that true magic is in the everyday, subscribe to my newsletter below for regular doses of enchantment. Want even more inspiration? Follow me on Instagram, Facebook, Pinterest, and Twitter. Here’s to a magical life!

Under the Influence of M.F.K. Fisher

It started with reading M.F. K. Fisher in the bubble bath.  About her time in France and her search for the perfect martini there, of all things.  She never found it but happily made do with a glass of rose for aperitif.  Before that you were enjoying another unassuming Monday night, looking forward to a simple salad and turning in early to read and drink tea.

But then you found yourself under the influence of M.F.K. Fisher.

You simply couldn't shake the description of the pink-glassed aperitif, of the rich musing of her first meals in France, the way food and wine served to punctuate the passionate episodes of her life.  As the bubbles faded in your bath and your thoughts turned toward dinner, your simple weeknight meal suddenly became an opportunity for more.

A quick scan of the fridge told you that there was still a half bottle of rose chilling and a few small wedges of nice cheese, not to mention the mountain of farmers' market vegetables.  You must make aioli, you decided, to dip your perfect radishes in.  And there is nothing to throwing together a small cheese plate of deep veined blue and ripe tilsiter cheeses, fat castelventrano and bella di cerignola olives.  And why not put on some old jazz tunes so that the whispers of French love songs float through the air in time to your gentle whisking of eggs and olive oil?  Soon your apartment was transported to Provence and full of M.F.K. Fisher's joie de vivre. 

The rose was dry and mineral-y on your lips, tasting only faintly of tart cherries and ripe strawberries.  You savored the ritual of whisking together your aioli, that perfect blend of garlic, egg yolks, and olive oil, as well as lining your plate with purple beans and radishes and tomatoes to dip in your sauce.  All at once your dinner was ready, your Monday night turned into a vibrant celebration, a feast for the senses.

Like M.F. K. Fisher, you forgot about the world for a moment, about everything but this sensuous meal, simply prepared and enjoyed to the fullest.

Enchantment Learning & Living is an inspirational blog celebrating life’s simple pleasures, everyday mysticism, and delectable recipes that are guaranteed to stir the kitchen witch in you. If you enjoyed what you just read and believe that true magic is in the everyday, subscribe to my newsletter below for regular doses of enchantment. Want even more inspiration? Follow me on Instagram, Facebook, Pinterest, and Twitter. Here’s to a magical life!

Peppery Radish Salad

If there was one root vegetable I hold in esteem above all others, it would be the humble radish.  It looks unassuming, often a spout of slightly spiky leaves and a little red and white body covered in dirt.  But the taste!  Don't get me started on the taste of a good radish.  It's surprisingly peppery with a bright bite that is balanced out by the not-unpleasant undertones of dirt and earth.  My fridge is never without a bunch of radishes, nor is my garden.

As a radish lover then, I like to keep my radish recipes as simple as possible.  Nothing is worse than a radish that's been coated in too much sauce or butter that its flavor gets lost.  The only exception to my sauce rule is aioli because a light aioli's lemony taste brings out the bright, crispy texture of this root veggie.  Still, it's best not to over-think it when it comes to eating this veggie, which is why I offer you this simple dish--ideal as a side or light meal--that uses only lemon to flush out the sunshine taste of the radishes and a little pepper to emphasize their bite.  You'll notice I also include the radish leaves in this recipe.  They are spicy and edible just like the root part of the plant.  Just make sure to buy organic and only use leaves that look crisp and full, not mushy or crumpled. 

Ingredients:

1 bunch radishes, washed

1/4 cup extra virgin olive oil

1/4 cup freshly squeezed lemon juice

1/2 teaspoon pepper

salt to taste

Separate the radish bottoms from the tops.  Thinly slice red radish bottoms and set aside.  Line four plates or shallow bowls evenly with radish leaves, then line those leaves with your radish slices.  Mix pepper, salt, olive oil and lemon juice in a mason jar and shake until combined.  Drizzle the dressing over each of your four salads.  Enjoy!  Serves 4.

Enchantment Learning & Living is an inspirational blog celebrating life’s simple pleasures, everyday mysticism, and delectable recipes that are guaranteed to stir the kitchen witch in you. If you enjoyed what you just read and believe that true magic is in the everyday, subscribe to my newsletter below for regular doses of enchantment. Want even more inspiration? Follow me on Instagram, Facebook, Pinterest, and Twitter. Here’s to a magical life!

Aioli

IMG_5285.JPG

It's been all about the farmers' market for me lately.  My meals revolve around the perfection of summer produce.  During this time of year, I find that I don't like heavy duty meals, especially at night.  For me, a heavy duty meal is anything that involves too much time over the stove, rich foods like meat, or any ingredients that require more than a quick wash and sauté or slice to be ready.  So naturally I am always looking for ways to enjoy my farmers market produce as simply as possible.

Which is where this aioli recipe comes in.  It is the perfect pairing to crisp radishes and green beans from the markets, or any other fresh veggie you can lay your hands on.  It requires very little prep time and absolutely no stove time.  It's like a fancy mayonnaise but much better for you.  Made up primarily of eggs and olive oil, this condiment is rich with good for you fats and can also be used as a spread for sandwiches or a base for salad dressing.  But honesty I don't usually have enough left over after pairing it with radishes to make it to the sandwich spread phase of aioli use.

Mmmmmm...a perfect appetizer or light dinner of aioli, radishes, purple beans, cherry tomatoes, and okra chips.

Mmmmmm...a perfect appetizer or light dinner of aioli, radishes, purple beans, cherry tomatoes, and okra chips.

You can blend these ingredients whisking by hand or in a blender or food processor.  I've even seen recipes for making it using a mortar and pestle!  The benefit of whisking by hand is that you get to build your upper body strength, but your aioli might be a little thinner.  If you want a thicker consistency, go with the blender.

Ingredients:

2 garlic cloves, finely minced

2 egg yolks

1/2 cup olive oil

1 juiced lemon

Salt to taste

In a bowl, whisk together egg yolks, garlic, and salt.  Slowly whisk in olive oil to allow it to blend into mixture and thicken.  Once all the olive oil is mixed in, whisk for 1-2 minutes until sauce thickens even more and develops a pale yellow color.  Add lemon juice and whisk thoroughly for another 1-2 minutes.  Taste test and add more salt if needed.  Store in mason jar in fridge for up to one week. Makes about 1 cup.

Enchantment Learning & Living is an inspirational blog celebrating life’s simple pleasures, everyday mysticism, and delectable recipes that are guaranteed to stir the kitchen witch in you. If you enjoyed what you just read and believe that true magic is in the everyday, subscribe to my newsletter below for regular doses of enchantment. Want even more inspiration? Follow me on Instagram, Facebook, Pinterest, and Twitter. Here’s to a magical life!

Ghee

Ghee, that magical clarified butter, is one of those foods that is good for you body and soul--and a cinch to make!  Basically, making ghee is all about separating the milk solids and impurities from the butter itself so that you are left with good-for-you fats, vitamins A, C, and E, anti-inflammatory properties, and a host of digestive benefits.  On top of that, Ayurvedic wisdom tells us that ghee is one of the purest and energetically replenishing foods we can eat to nourish our spirit. 

According to them, ghee is infused with the energy we put into it, helping us to replenish our natural life force.  And it makes sense if you think about it. Like with anything you cook, you put your own energy and love into whatever it is you are making.  It's kind of like a proverbial spell or kitchen magic that gets conjured every time we fire up the stove and prepare a meal for ourselves and loved ones.  However you like to think of it, when you make this ghee--or anything else--it's a good idea to infuse your food with nourishing, happy thoughts.  Who would want to eat food that's made with anything else?

My sister taught me how to make this over the weekend because I have long loved the depth of flavor ghee gives to the dishes she cooks.  It has all the richness of butter, without the bad fats.  You can also play around with the depth of butter browning.  I like my butter to get a little toasty because it deepens the flavor to a smokey caramel.  If you don't like that taste, you can always pull the butter off the stove sooner.  Make sure to use unsalted butter because it is a higher quality than its salted cousin.  Ghee's high smoking point makes it ideal for a stir fry and other high-temp cooking.  It also elevates a simple piece of toast to something akin to the divine.  This recipe is for a smaller batch so feel free to double (or triple!) it if you know you will be using a lot of ghee.

Ingredients:

1/2 cup (1 stick) of unsalted butter

Place butter in a small saucepan and let melt on medium-low heat for about 5 minutes until butter melts.  You will begin to see the top get opaque.  This is how you know the clear fats (below) are separating from the dairy fats (on the top).

Once you see that, continue cooking butter until it begins to bubble.  Allow to keep cooking for about 5-10 minutes, or until butter browns and the bubbles begin to get smaller.  Then remove from heat an strain through cheesecloth or a metal strainer into a mason jar for storage. Your strainer will have some gunk in it--the dairy fat and other junk--which you can just throw out.

Allow to cool completely before using.  Store in pantry (no refrigeration necessary!) for up to three months (although really, you will gobble this all up before then).  Makes 1/2 cup. 

Enchantment Learning & Living is an inspirational blog celebrating life’s simple pleasures, everyday mysticism, and delectable recipes that are guaranteed to stir the kitchen witch in you. If you enjoyed what you just read and believe that true magic is in the everyday, subscribe to my newsletter below for regular doses of enchantment. Want even more inspiration? Follow me on Instagram, Facebook, Pinterest, and Twitter. Here’s to a magical life!

Tomato & Mozzarella Salad

Earlier in the week, I posted my Cherry Tomato Summer Salad, an easy, refreshing dish that highlights that flavors of this perfect summer fruit.  Since you know my love for a good tomato borders on the pornographic (remember my effusions on the first tomatoes from my own garden?), I thought I'd offer you another tomato salad recipe, this one just as simple and delicious as the last. 

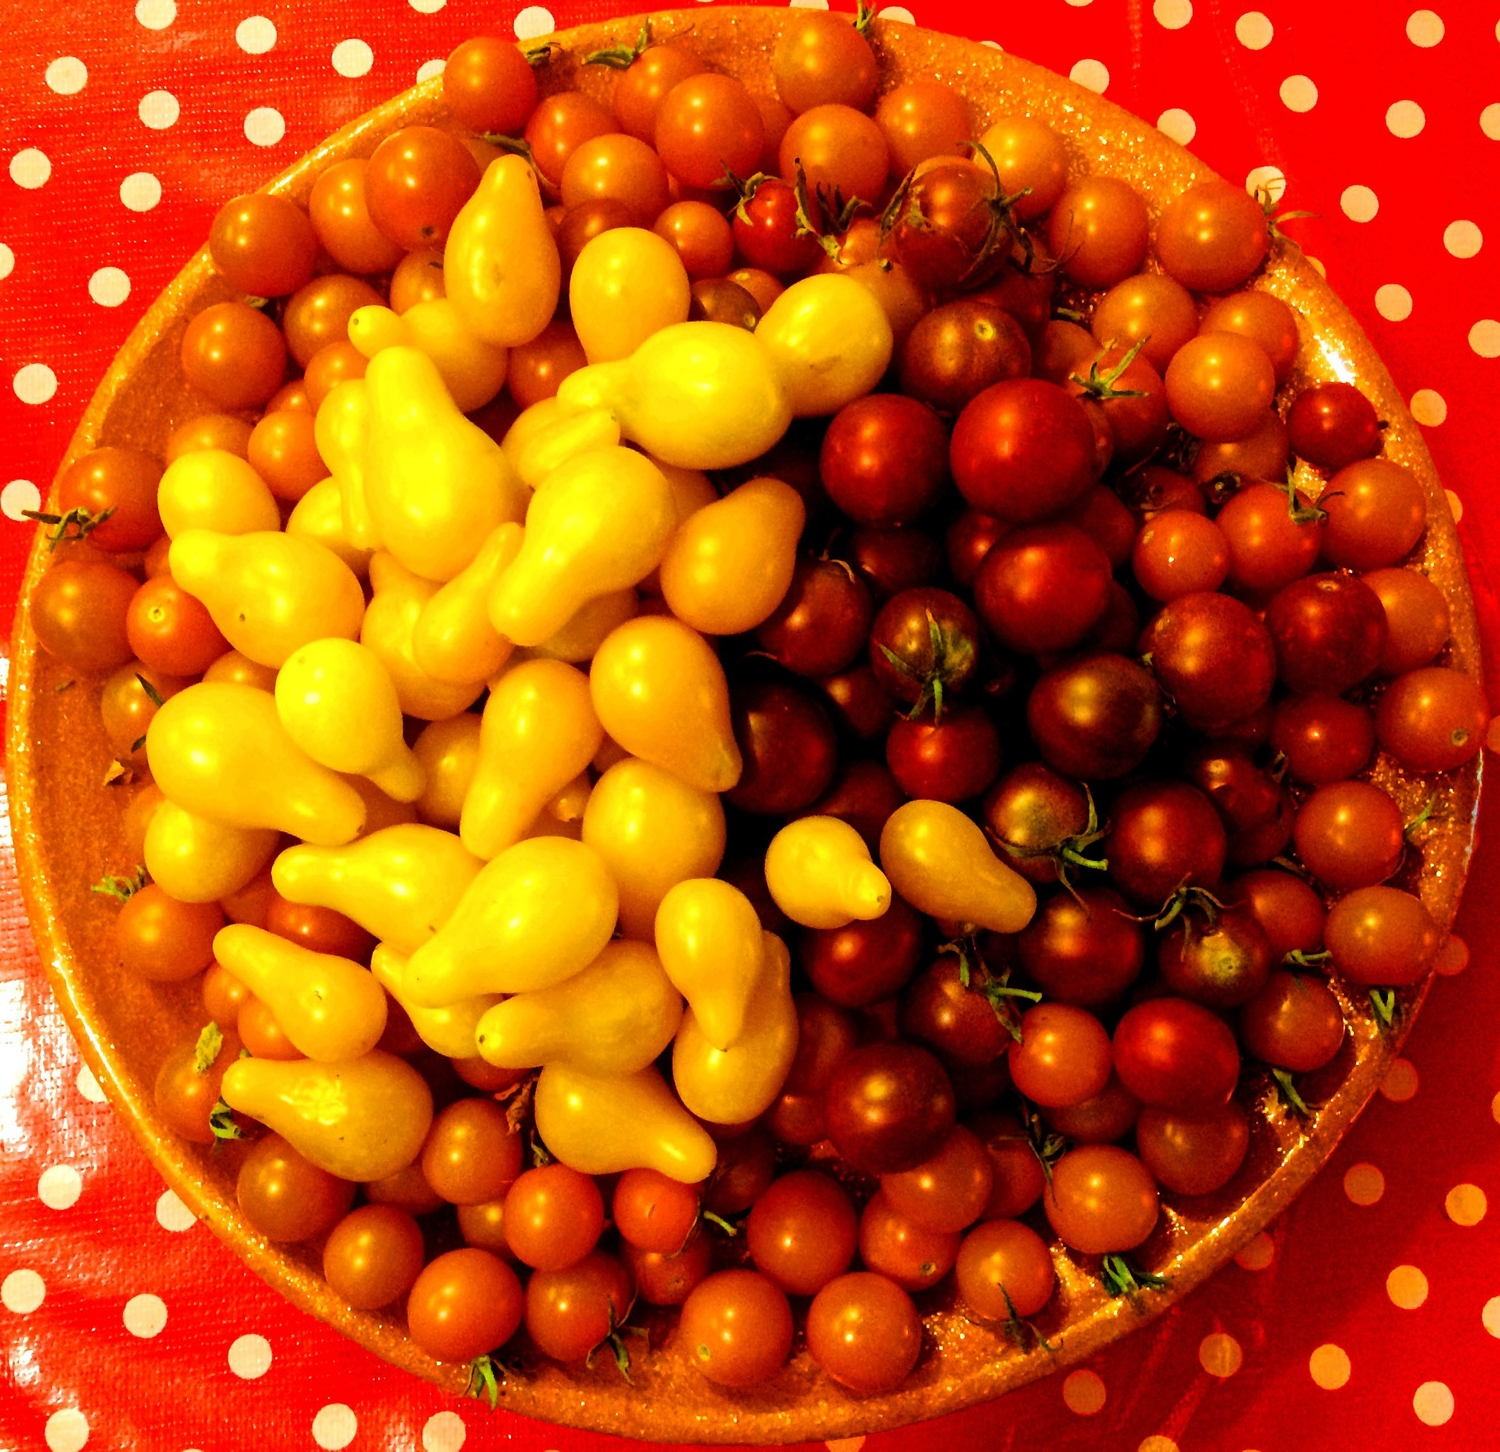
It makes a perfect light meal or a great side dish for an Italian dinner.  I love making this salad for Sunday pasta night with my family!  It has a big wow factor, both in taste and presentation, but takes only five minutes to prepare.  Unlike traditional tomato and mozzarella salads, I go easy on the cheese, using it more as an accent to the tomatoes rather than as a competing flavor.  Feel free to play with the types of tomatoes you use too.  I used more yellow pear, chocolate rose, and sun gold cherry tomatoes here, but the recipe can easily be tweaked to accommodate what you have on hand.

Ingredients:

4 cups cherry tomatoes

8oz small mozzarella balls (one container)

1/2 cup basil

3 tablespoons extra virgin olive oil

3 tablespoons white wine vinegar

salt & pepper to taste

Place washed cherry tomatoes in salad bowl.  Slice mozzarella balls (roughly the size of your cherry tomatoes) in half and add to your bowl.  Shred basil and add to salad, then stir until ingredients are combined.  Drizzle olive oil and vinegar over ingredients and stir until thoroughly mixed.  Add salt and pepper to taste and stir.  Serves 4 as a light meal or 6 as a side dish.  Enjoy!

Enchantment Learning & Living is an inspirational blog celebrating life’s simple pleasures, everyday mysticism, and delectable recipes that are guaranteed to stir the kitchen witch in you. If you enjoyed what you just read and believe that true magic is in the everyday, subscribe to my newsletter below for regular doses of enchantment. Want even more inspiration? Follow me on Instagram, Facebook, Pinterest, and Twitter. Here’s to a magical life!

Cherry Tomato Summer Salad

IMG_5199.JPG

What is summer without the delight of tomatoes fresh from the vine?  They taste like distilled sunshine and sweet, sweet earth...I could go on forever about these perfect summer jewels which is probably why I end up with piles of these delicious fruits in forms and varieties sitting on my kitchen counter ready to be devoured.  This especially true for cherry tomatoes that are like individually wrapped treats I can pop in my mouth like candy (only better because I don't really like candy, just clean, healthy food). 

One of my favorite ways to enjoy cherry tomatoes is to use them in this easy salad.  It celebrates the perfection of the heirloom cherry tomato with minimal ingredients to weight them down.  Think of it as a bread-less bruschetta.  The only real difference between my salad and a tomato bruschetta topping is the bitter dandelion greens I add to balance out the sweetness of the tomatoes.  Or you can almost think of it as a variation of my spicy cherry salad, minus the spice.

I like to use a variety of cherry tomatoes, here being yellow pear, chocolate rose, and sun gold (pictured below).  It doesn't matter what type of tomatoes--including larger varieties--you use as long as they are super fresh, either from your garden or the farmers market.  Store bought just won't give you the same taste.  Lastly, I keep the dressing light, just enough to coat the ingredients without overshadowing the tomatoes, and rarely use salt in my recipe since these fresh ingredients hardly need to coax out their flavor.  This dish makes a light summer dinner or a perfect side salad.

IMG_5194.JPG

Ingredients:

2 cups heirloom cherry tomatoes

1/2 cup dandelion greens

1/4 cup basil

1 garlic clove

1 tablespoon balsamic vinegar

1 tablespoon extra-virgin olive oil

salt to taste (optional)

Slice the heirloom tomatoes in half and place in a salad bowl.  Shred dandelion greens and basil and add to bowl, stirring until combined.  Mince garlic and add to bowl, stirring until combined.  Drizzle olive oil and vinegar to bowl and mix again.  Add salt of desired. Serves 2. Enjoy!

Enchantment Learning & Living is an inspirational blog celebrating life’s simple pleasures, everyday mysticism, and delectable recipes that are guaranteed to stir the kitchen witch in you. If you enjoyed what you just read and believe that true magic is in the everyday, subscribe to my newsletter below for regular doses of enchantment. Want even more inspiration? Follow me on Instagram, Facebook, Pinterest, and Twitter. Here’s to a magical life!

Lavender Foot Scrub

So yesterday I talked about the importance of giving your feet a little extra TLC, especially after moving or doing other activities that keep you on your feet all day (teachers, I'm talking to you!).  In that blog, I extolled the virtues of my Honey Eucalyptus Foot Soak, a perfect way to sooth and refresh your tootsies.  Today I offer you another such treat in the form of a foot scrub.  Like my foot soak that can be turned into a full-on bath, this foot scrub can also be used as a regular body scrub, but it is especially nice on the soles of your feet.  The rough texture of the sea salt smooths away dead skin while the lavender is a natural relaxant and anti-inflammatory and anti-bacterial. 

I use less olive oil in this recipe than I would in a body scrub because you want more grit than moisture for a foot scrub.  Since the soles of your feet are tougher than the rest of your skin, the extra grit offers more exfoliation.  If you want to use this as a body scrub, just add another 1/4 cup olive oil to soften it.  Ready for the big kicker?  You can also use this as a foot soak!  So why not double the recipe and use half to soak your feet and the other to scrub them clean?

Ingredients:

1 cup sea salt

1/4 cup olive oil

10 drops lavender essential oil

2 tablespoons dried lavender buds (optional)

Combine ingredients in a bowl and transfer to a mason jar to store.  To use, wash feet thoroughly.  Generously apply the scrub to feet and work it across your skin with your hands, spending more time on rougher areas.  Rinse when complete and moisturize feet.  Makes about 1 cup.  Enjoy!

Enchantment Learning & Living is an inspirational blog celebrating life’s simple pleasures, everyday mysticism, and delectable recipes that are guaranteed to stir the kitchen witch in you. If you enjoyed what you just read and believe that true magic is in the everyday, subscribe to my newsletter below for regular doses of enchantment. Want even more inspiration? Follow me on Instagram, Facebook, Pinterest, and Twitter. Here’s to a magical life!