Enchantment Learning & Living Blog

Welcome to Enchantment Learning & Living, the inspirational space where I write about the simple pleasures, radical self-care, and everyday magic that make life delicious.

Quick-Pickled Veggies

Confession: I am a pickle addict.  Given my own way, I'd pickle anything...and that's not even getting into my current obsession with a good dirty martini made with my homemade pickling juice.  So naturally, I always like to have a jar of quick pickled veggies on hand.  They are healthier than the store bought varieties (read: less salt and other additives), you can choose your own seasonings, and they are a great way to spice up anything from a simple sandwich to an impromptu salad.  They even make a great appetizer on their own or with a little aged Gouda. Yum! 

Feel free to experiment with the veggies and spices you have on hand.  I've done this with just beets when I had too many on hand and swapped out the coriander with dill seed (or put in both!).  Or if you don't have apple cider vinegar on hand, swap it out with white vinegar.  Make sure to get organic veggies, too--you don't want the pesticides of non-organic veggies soaking in your brine.  Your local farmers market is a good place to get the ingredients.

Ingredients:

1 cup apple cider vinegar

1 cup water

1 yellow onion

6-8 radishes

1 cucumber

2 carrots

2 garlic cloves

1 teaspoon considerate seeds

1 teaspoon red chile flakes

1 teaspoon sea salt

Thinly slice all veggies and mix them up in a large bowl.  In a small saucepan, bring vinegar, water, spices, and salt to a boil (about 10 minutes on medium heat).  Remove saucepan from heat and let liquids cool for about 10 minutes.  While the liquids are still warm, pour over sliced veggies. Let sit until completely cooled then divide the veggies and brine equally into 2+ mason jars.  Store in fridge.  These pickles will be ready to eat in two hours but can last up to two weeks in the fridge.  Enjoy!

Enchantment Learning & Living is an inspirational blog celebrating life’s simple pleasures, everyday mysticism, and delectable recipes that are guaranteed to stir the kitchen witch in you. If you enjoyed what you just read and believe that true magic is in the everyday, subscribe to my newsletter below for regular doses of enchantment. Want even more inspiration? Follow me on Instagram, Facebook, Pinterest, and Twitter. Here’s to a magical life!

Quick Apricot-Basil Jam

Sometimes an afternoon calls for jam on toast--with a cup of tea, of course!  I love jam, but too often find that the store-bought kind loses the flavor of the fruit with too much sugar.  What's the point of enjoying an apricot jam, for example, if it tastes more like corn syrup than those perfectly tart stone fruits?  Naturally, faced with this dilemma (and another heap of apricots I wasn't sure how to finish), I set about figuring out how to make my own jam.  I had two caveats: it must taste like the real fruit (so minimal sugar) and it must be easy (the thought of canning, standing over a boiling pot of water sterilizing jam jars felt like too much work in this summer heat).

After searching the interwebs, I found my inspiration in a Blackberry Chia Seed Jam recipe from Two Peas and Their Pod and a How to Make Chia Seed Jam tutorial from Oh My Veggies.  The reoccurring theme?  Chia seeds!  They replace the pectin that helps the jam gel.  These little orbs turn translucent and gummy when exposed to heat, giving them a texture similar to tapioca as you might remember from my Easy Vanilla Cinnamon Chia Seed Pudding recipe.  I also threw in a handful of basil because I love the combination of tart fruit and earthy herbs.  What's great about this recipe is that it is so versatile that you play around with your favorite fruit and herb combinations. 

Ingredients:

2 cups diced apricots

1/4 cup chopped basil

1 organic lemon, juiced

2-3 tbsp honey (depending on how sweet you like your jam)

2 tbsp chia seeds

1 tsp vanilla extract

Combine fruit, lemon juice, vanilla extract, and honey in a saucepan and cook on medium until fruit begins to break down, about 10 minutes.  Reduce heat and stir in basil. Cook for two more minutes.  Remove from heat and stir in chia seeds.  Allow to cool completely.  Store in a mason jar for up to two weeks.  Serve on toast, as a compote with age cheddar, or over your morning oatmeal. Enjoy!

Enchantment Learning & Living is an inspirational blog celebrating life’s simple pleasures, everyday mysticism, and delectable recipes that are guaranteed to stir the kitchen witch in you. If you enjoyed what you just read and believe that true magic is in the everyday, subscribe to my newsletter below for regular doses of enchantment. Want even more inspiration? Follow me on Instagram, Facebook, Pinterest, and Twitter. Here’s to a magical life!

Veggie Stuffed Bell Peppers

I am all about the stuffed anything: bell peppers, in this case, or avocados, or tomatoes.  I love the concept of using something edible as a container for a nutritious meal; it also helps with portion control (a useful tool when my eyes are bigger than my stomach!).

These stuffed bell peppers came to me one night when I had a handful of veggies that I didn't quite know what to do with--about 3/4 cup chickpeas and a handful of mushrooms leftover from my Chickpea & Mushroom Salad, a forgotten chunk of frozen kale, and half a jar of capers.  I was once again flipping through the New Vegetarian cookbook when I stumbled across a recipe for stuffed bell peppers.  I didn't have the tomatoes or olives that the original recipe called for, but I did have bell peppers and my random collection of food odds and ends.  Thus a new dish was born.  You can eat it on its own or serve it on a bed of lettuce--either way is delish!

Ingredients:

1 red bell pepper

3/4 cup chickpeas

5-6 mushrooms, finely chopped

1/4 cup capers

1/4 sun-dried tomatoes (re-hydrated)

3/4 cup kale, finely chopped

1/4 cup nutritional yeast

2 oregano sprigs, leaves finely chopped

Olive oil

Preheat ovenr 350 degrees.  Slice bell pepper in half longwise, removing seeds and stem.  Mix all other ingredients in a separate bowl.  Once fully combined, stir in 2 tablespoons olive oil and mix thoroughly.  Spoon the filling evenly into each bell pepper half.  Drizzle with more olive oil and set on pan.  Cook in oven for 20 minutes.  Allow to cool for 5 minutes before eating.  Serves 2 as a light meal.  Enjoy!

Enchantment Learning & Living is an inspirational blog celebrating life’s simple pleasures, everyday mysticism, and delectable recipes that are guaranteed to stir the kitchen witch in you. If you enjoyed what you just read and believe that true magic is in the everyday, subscribe to my newsletter below for regular doses of enchantment. Want even more inspiration? Follow me on Instagram, Facebook, Pinterest, and Twitter. Here’s to a magical life!

Chickpea & Mushroom Salad

Come summertime, all I want to eat is salad.  And fruit.  And basically anything that is light and super easy to fix so I can spend more time outside hunting for ladybugs and collecting daisies...or something along those lines.  Which brings me to this delicious, simple dinner that can be made at the drop of a hat--especially for those nights when you aren't sure what to make.  The kicker with this recipe is that it's actually a warm salad--a nice break for your system, which can have a hard time digesting raw veggies all the time.  I adapted this recipe from Celia Brooks Brown's New Vegetarian cookbook when I found myself one night with too many chickpeas and not enough creative inspiration for dinner.  It was then my Chickpea & Mushroom Salad was born.  I added in turmeric, chives, and other little ingredients to provide extra nutrition and flavor, and swapped out the called-for spinach for mixed-greens (mostly because that was what I had one hand).  The yogurt mint and chive dressing provides the perfect tangy balance to the cumin and turmeric cooked mushrooms and chickpeas.  Now this recipe is one of my go-to weeknight dinners!

Ingredients:

16 ounces cooked chickpeas (1 can, drained and rinsed, or one cup cooked)

12 ounces button mushrooms

1 small sweet onion, diced

3 tablespoons olive oil, plus more for sautéing mushrooms and chickpeas

2 cloves garlic, diced

1teaspoon chile seeds

2 teaspoons cumin

2 teaspoons turmeric

3 tablespoons lemon juice (about 2 lemons)

3/4 cups plain yogurt

2 tablespoons fresh mint, chopped

2 tablespoons fresh chives, chopped

5 cups mixed greens

Salt to taste

Heat oil in pan.  Cut mushrooms in half and add them to the pan and cook until soft.  Reduce heat and add diced onion and garlic and cook for 2 more minutes or until onions turn translucent.  Then add chickpeas, cumin, turmeric, chile seeds, and salt to taste.  Sauté for 1 minute then add 1 tablespoon lemon juice and let mixture simmer on low while you prepare the salad dressing.

For the salad dressing, mix together yogurt, olive oil and remaining lemon juice until combined.  Mix in chives and mint, then salt to taste.  Divide mixed greens between 4 plates, then add the chickpeas and mushrooms on top of the lettuce.  Finally, pour yogurt dressing over the mushrooms and chickpeas.  Serves 4.  Enjoy!

Enchantment Learning & Living is an inspirational blog celebrating life’s simple pleasures, everyday mysticism, and delectable recipes that are guaranteed to stir the kitchen witch in you. If you enjoyed what you just read and believe that true magic is in the everyday, subscribe to my newsletter below for regular doses of enchantment. Want even more inspiration? Follow me on Instagram, Facebook, Pinterest, and Twitter. Here’s to a magical life!

Watermelon Cooler

Watermelon cooler (here made with basil, lemon, and lime) ready for an evening on the porch!

Watermelon cooler (here made with basil, lemon, and lime) ready for an evening on the porch!

When the sizzling temperatures of summer hit, I find myself craving watermelon juice.  Perhaps it is because of the great memories I have of drinking this delicately refreshing drink after many a hot yoga practice or because I always find myself with an extra watermelon in my fridge, but in either case, I find this watermelon cooler a go-to drink for the summer.  As I've gotten used to "juicing" watermelon, I've played around with this cooler, adding fresh lime juice to compliment the sweetness of the melon and even herbs, like basil or mint, to give the drink an extra kick.  This drink is great for overripe melons; while their texture might be grainy and less-than-appetizing, their juices are still plenty sweet and delicious.  This recipe also makes a great mocktail (or virgin cocktail) for those times you want a festive, hydrating drink.  If you want to make a full-fledged cocktail out of it (as I've been known to do come Friday night), you can simply add a shot of vodka to your drink.  Don't have limes on hand?  Swap them out with lemons.  It's pretty versatile!

Ingredients:

1 medium sized watermelon, the flesh scooped out, rinds discarded (about 4 cups)

3 limes, juiced (about 2-3 tablespoons)

3 tablespoons basil simple syrup (optional)

To make basil simple syrup, simply follow the instructions in my ginger simple syrup recipe, making sure to swap out the ginger with two cups of fresh basil leaves. 

Freshly pureed watermelon being poured into pitcher via a sieve.

Freshly pureed watermelon being poured into pitcher via a sieve.

Blend watermelon chunks in batches in a blender on medium speed until pureed.  Then pour pureed watermelon into a pitcher, using a sieve to separate the pulp from the juice.  Once all the juice is in the pitcher, stir in lime juice and taste.  If you want more of a lime taste, you can juice and add more.  Then, if you would like, add the basil simple syrup.  Enjoy!  Makes about 4 servings.


Enchantment Learning & Living is an inspirational blog celebrating life’s simple pleasures, everyday mysticism, and delectable recipes that are guaranteed to stir the kitchen witch in you. If you enjoyed what you just read and believe that true magic is in the everyday, subscribe to my newsletter below for regular doses of enchantment. Want even more inspiration? Follow me on Instagram, Facebook, Pinterest, and Twitter. Here’s to a magical life!

Breakfast Granola

Mmmmm...looks like the perfect breakfast to me: granola topped with Greek yogurt and fresh raspberries. 

Mmmmm...looks like the perfect breakfast to me: granola topped with Greek yogurt and fresh raspberries. 

If you've never made homemade granola before, you are in for a treat.  The smell of cinnamon and toasting nuts emanating from the oven is as intoxicating as any baked good perfuming your home.  And there is nothing better in the summer than homemade granola topped with Greek yogurt and fresh fruit for breakfast.  It's fast, it's filling, and it's sooooo delicious!  My mom first got me into granola after she and my dad had the amazing homemade stuff at a B&B in Canada.  They brought home the recipe book, and we immediately set to making our own. 

Now I usually use what I have on hand in the kitchen to make granola--whatever nuts, spices, and grains stuck in the back of my pantry.  The recipe is versatile and forgiving--my kind of recipe!  You can easily swap out ingredients for others and play around with different flavors (vanilla extract this time, loads of ginger the next).  One of the other great perks of making your own granola is that you can control the sugar content.  Most store-bought granola has way more sugar and salt than is healthy for you.  By making your own, you can get the benefits of this nutrient-dense breakfast without sugar or salt overload. 

Ingredients:

4 cups multi-grain oats

1 cup sunflower seeds

1 cup pepitas (pumpkin seeds)

1 cup almonds

1/2 cup flax seed meal

1/2 cup chia seeds

1 tsp cinnamon

1 tsp vanilla extract

3/4 cup honey

1 cup olive oil

Preheat oven to 325 degrees.  Mix all dry ingredients together in a large bowl, then slowly add oil, honey, and vanilla extract until they fully coat the dry ingredients. 

Spread out mix evenly on a large baking sheet (you will have to work in batches).  Make sure that you don't overload the pan, or it will cook unevenly.  Baking until toasted, about 20 minutes. 

Raw granola mixture ready for the oven.

Raw granola mixture ready for the oven.

Stir once halfway through.  Remove from oven and let cool.  Store in an airtight container for 2-4 weeks.  Makes around 15 servings.  Serve with berries and yogurt for breakfast or on its own as a light afternoon snack.  Enjoy!

Granola fresh from the oven, cooled, and ready for pantry storage.

Granola fresh from the oven, cooled, and ready for pantry storage.

Enchantment Learning & Living is an inspirational blog celebrating life’s simple pleasures, everyday mysticism, and delectable recipes that are guaranteed to stir the kitchen witch in you. If you enjoyed what you just read and believe that true magic is in the everyday, subscribe to my newsletter below for regular doses of enchantment. Want even more inspiration? Follow me on Instagram, Facebook, Pinterest, and Twitter. Here’s to a magical life!

Basil-Nutritional Yeast Pesto

Fresh basil from the garden.

Fresh basil from the garden.

I love basil--and pesto.  I literally cannot live without either of these culinary miracles, especially in the summer when the basil is plentiful and it is so easy to whip up a batch of this flavor enhancing sauce.  I like to make a big batch of it and freeze it in little ice cube trays.  When I need a little something extra for pizza, salad dressing, or pasta sauce, I just pop out one of these frozen pesto cubes and--wala!--my evening meal is elevated to summery deliciousness.  This pesto is also great for making your own Seussian "green eggs" (ham optional). 

Usually, when It comes to making pesto, I just use what I have on hand in terms of nuts (almost always sunflower seeds) and cheese.  Lately, I have been l loving swapping out the traditional Parmesan cheese for nutritional yeast in my recipe.  This yeast is actually deactivated yeast that has a cheesy, nutty flavor and is often used as a cheese substitute in vegan dishes.  It can be found in most health food stores.   It is delicious, low in calories, and so good for you because it is high in fiber, protein, and vitamin B-12.  I also don't often put salt in my pesto, especially if I am going to freeze it because I want to make sure I don't over salt my dish if I am using pesto with other salty ingredients like prosciutto or mozzarella.  So I refrain from adding salt until I know what I'm pairing it with.  Let's just say I learned to tread lightly with the seasoning of my pesto after one too many salty dishes!

Ingredients:

2 cups packed organic basil

1 clove garlic

1/4 cup sunflower seeds

2/3 cup extra-virgin olive oil

1/2 cup nutritional yeast

Salt to taste (optional)

Add first three ingredients in a food processor until roughly chopped and blended.   Then add oil and mix until combined.  Finally, add in nutritional yeast (and salt if using) and combine.  Transfer to bowl or mason jar.  Store in fridge for 2-3 days or up to three months in freezer using ice cube trays.  Enjoy!

Enchantment Learning & Living is an inspirational blog celebrating life’s simple pleasures, everyday mysticism, and delectable recipes that are guaranteed to stir the kitchen witch in you. If you enjoyed what you just read and believe that true magic is in the everyday, subscribe to my newsletter below for regular doses of enchantment. Want even more inspiration? Follow me on Instagram, Facebook, Pinterest, and Twitter. Here’s to a magical life!

Prosciutto Wrapped Apricots

Everyone is more or less familiar with the amazingly delicious--and simple--Italian recipe of prosciutto and melon, where fresh cantaloupe is wrapped in that wonderfully salty cured meat.  The sweetness of the melon plays nicely with the saltiness of the prosciutto, making it a crowd-pleaser.  Because of its short prep time (I literally just slice the melon and drape prosciutto over it), this dish is one of my favorite summer appetizers to serve.

Freshly plated appetizers on a hand-made mica clay platter made by KlaybyKate.

Freshly plated appetizers on a hand-made mica clay platter made by KlaybyKate.

I found myself playing around with this combination of salty and sweet when I got one too many organic apricots at the store.  It is a well-known fact that I have little to no self-control when it comes to the fresh fruit of the summer season; I see it, I buy it.  So there I was with too many apricots, some prosciutto, and in the needing to put together an appetizer for my family's regular Sunday dinner.  The apricots were perfectly ripe and tartly sweet.  Why not, I asked myself, swap out the traditional melon with these stone fruits for a riff on a classic recipe?  I tried it; I served it to my family-- the prosciutto wrapped apricots didn't last long.  They were fantastic!  The tart and sweet of the apricots were the perfect contrast to the salty cured meat.  Now some people prefer to grill the apricots or used dried apricots.  However, I decided to leave them raw in my recipe because a perfectly ripe apricot is hard to beat.  Plus, I am all in favor of less time over a hot stove in the summer and more time enjoying a cocktail and appetizers outside.  I used only a little bit of prosciutto for each apricot half, but feel free to experiment with the ratio--you may want to quarter your fruit and wrap more of the salty meat around it.   It just depends on your personal preference; my family liked more fruit and less prosciutto.

Ingredients:

8 apricots halved

1/4 lb prosciutto (more or less)

Gently wrap prosciutto slices around each apricot half, using 1/4 to 1/2 of a prosciutto slice per half of fruit, then plate them.  Serve immediately.  Serves anywhere from 2-6 people, depending on how much you want to nibble before dinner.  Enjoy!

Enchantment Learning & Living is an inspirational blog celebrating life’s simple pleasures, everyday mysticism, and delectable recipes that are guaranteed to stir the kitchen witch in you. If you enjoyed what you just read and believe that true magic is in the everyday, subscribe to my newsletter below for regular doses of enchantment. Want even more inspiration? Follow me on Instagram, Facebook, Pinterest, and Twitter. Here’s to a magical life!

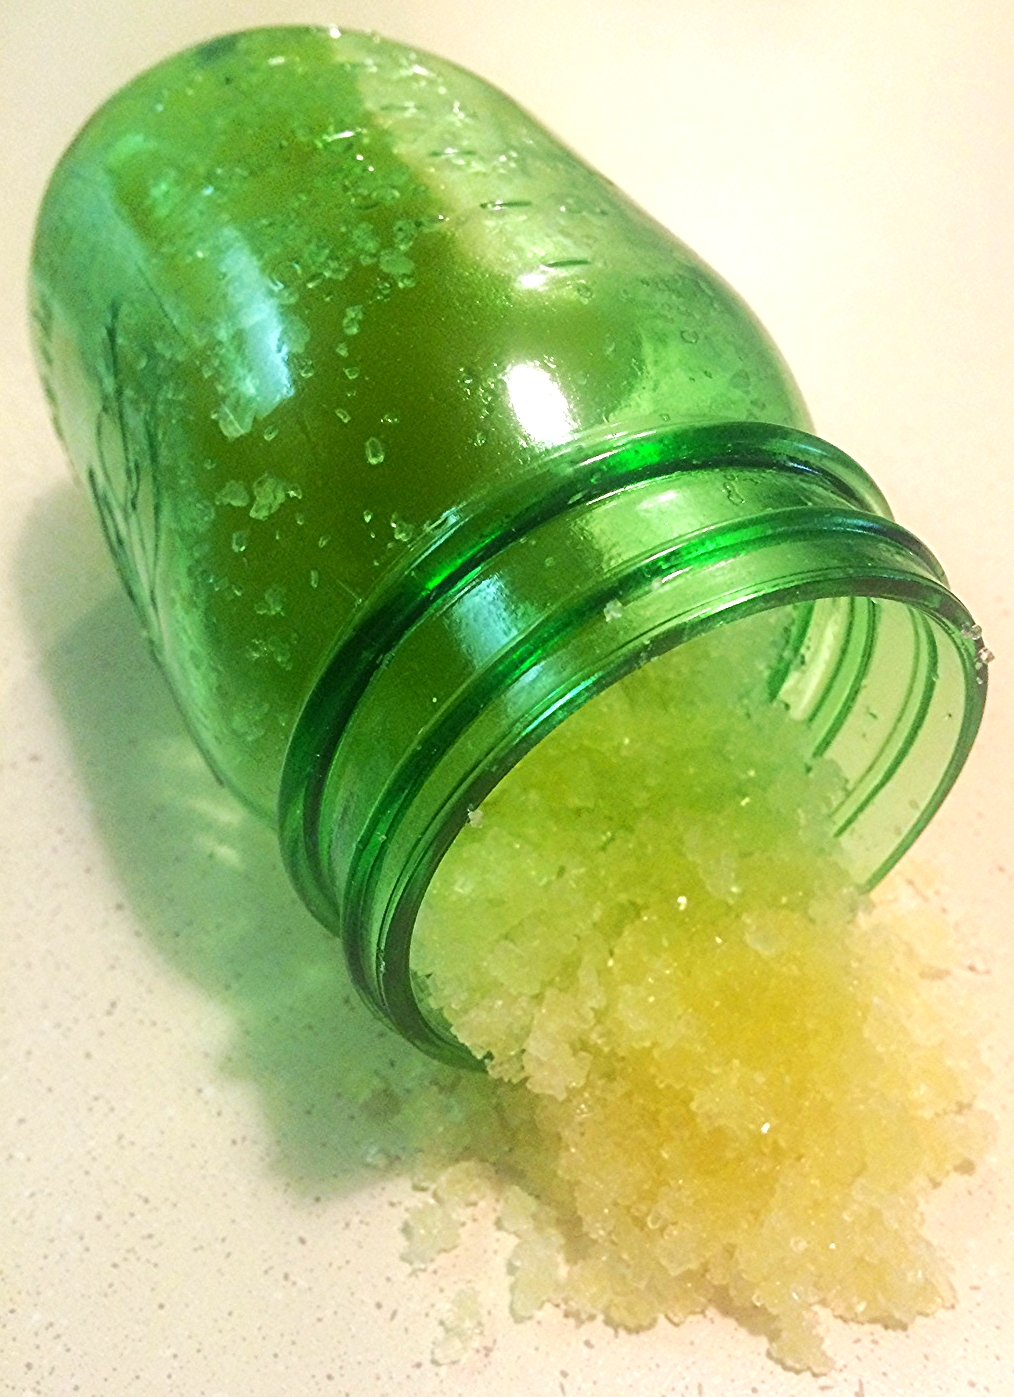
Mojito Body Scrub

Nothing says summer like a nice, tall mojito--the mint and citrus cool you down after a day in the sun like nothing else.  Just the smell of mint and citrus evokes fantasies of sipping this perfect drink poolside while sunning myself!  But all the sunbathing leaves us with another important part of summer: self-care, especially for the skin.  I concocted this scrub in honor of both these things (self-care and mojitos), so my skin feels tingly fresh and ready for a day at the beach--or more realistically, my patio.  Use this with my mojito body butter and you've got a recipe for perfect skin all summer long!

Ingredients:

2 cups Epsom or sea salts or sugar (I used whatever I have on hand)

Mojito body scrub freshly packaged in a green mason jar--makes a great gift!

Mojito body scrub freshly packaged in a green mason jar--makes a great gift!

1 cup olive oil

20+ drops peppermint essential oil

20+ drops lemon essential oil

Mix ingredients in a bowl and transfer to a mason jar or other airtight container.  You can add more of the essential oils to get a more pungent smell.  Store in a cool, dry place for up to a month.  To use, scrub liberally over body after soaping down.  Avoid face.  Rinse.

Enchantment Learning & Living is an inspirational collection of musings touching on life’s simple pleasures, everyday enchantments, and delectable recipes that will guarantee to stir the kitchen witch in you.  If you enjoyed what you just read and believe that true magic is in the everyday, subscribe here.

Want even more inspiration to make your dream life a reality?  Follow me on Facebook, Pinterest, and Twitter.  Thanks for following!

Mojito Body Butter

Fresh body butter ready to be stored.

Fresh body butter ready to be stored.

Recently, I ran out of my stash of homemade body butter and made do for a few weeks with store-bought lotion--what a waste!  My skin was dryer than dry and lost that luscious softness that can only be achieved with my own body butters.  Even when I switched to plain old coconut oil in favor of the lotion, my skin felt greasy more than hydrated.  So it was with great relief when I finished school that I could set aside an afternoon for making this moisturizer.  Then, feeling the summer spirit, I decided to whip up a stash of mojito body butter, which would pair well with my mojito body scrub.  I adapted my recipe from the book Organic Body Care Recipes--an amazing trove of great DIY self-care treats.  After a week back using my butter, my skin feels minty fresh and supple!

While making your own body butter might seem complicated or like it takes a lot of steps, it's really pretty easy.  The trick is to go slow; the hardest part (really not that hard), is waiting for the beeswax to melt.  I like to melt it separately from my other ingredients because it takes the longest to melt.  Once melted, you can slowly add other ingredients.  Don't be alarmed if the beeswax seems to harden with the introduction of oils--just add the oils a little at a time, and it will slowly melt down again.

Special Tools:

Clean tin can

Old saucepan

Ingredients from left to right: essential oils, coconut oil, olive oil, distilled water, and beeswax.

Ingredients from left to right: essential oils, coconut oil, olive oil, distilled water, and beeswax.

Blender

Spatula

Ingredients:

3/4 cup olive oil

1/3 cup coconut oil

4 tablespoons beeswax, roughly chopped into small pieces

1 cup distilled water

30 drops peppermint oil

30 drops lemon oil

Tin can in sauce pan with some beeswax in it.  I prefer to use an old saucepan that I don't cook with anymore--I use it strictly for beauty treats.

Tin can in sauce pan with some beeswax in it.  I prefer to use an old saucepan that I don't cook with anymore--I use it strictly for beauty treats.

1. Place the saucepan on low heat and fill halfway with water.  Then place the clean tin can in the center of the saucepan.  Put the beeswax in the tin can and let melt slowly. When beeswax is melted, remove from heat and allow to cool to room temperature (but not to solidify) about 5-10 minutes.

2.  While beeswax is cooling, mix together olive oil and coconut oil in a small bowl.  Heat for two minutes in microwave and let cool about 5 minutes. 

3.  Heat the distilled water (still in a microwave safe measuring cup) for two minutes in the microwave and let cool about five minutes.

Pouring the last of the melted beeswax into the blender while it mixes ingredients on medium speed.

Pouring the last of the melted beeswax into the blender while it mixes ingredients on medium speed.

4.  Blend your ingredients in a blender.  First add half of the oil mixture and begin to mix it on medium.  Once the oils begin to thicken, add half the water, then half the beeswax.  Blend for another 10-15 seconds or until first half of your ingredient are blended and being to thicken.  Using a spatula, scrape down the sides of the blender and then begin blending on medium again.  Add remaining ingredients (oils, water, beeswax) one at a time until fully incorporated together.  Scrape down the sides one last time and blend for another 10-15 seconds.  The mixture should be thick.

5.  Turn off blender and add essential oils, stirring them in manually with your spatula, then blend completely on medium for another 10 seconds.

Freshly jarred homemade body butter, cooling.

Freshly jarred homemade body butter, cooling.

6.  Pour body butter into containers (I use mason jars) and let cool for at least half an hour before capping.  If you find your water separating from your oils, don't worry, that's normal.  It just means that the water temp and the oil temp weren't the same when you blended them.  I've noticed the more I make this recipe (or variations of it!), the less that happens, so just keep practicing.  Store in a cool, dry place for up to one month or in the fridge for six months--that is the advice the book I adapted the recipe from gave.  Personally, I have stored this body butter in my bathroom sink for a couple months and it has been fine sans fridge.

7.  To use, apply after bathing or showering.  Use only a little at a time--a little goes a long way!

Enchantment Learning & Living is an inspirational blog celebrating life’s simple pleasures, everyday mysticism, and delectable recipes that are guaranteed to stir the kitchen witch in you. If you enjoyed what you just read and believe that true magic is in the everyday, subscribe to my newsletter below for regular doses of enchantment. Want even more inspiration? Follow me on Instagram, Facebook, Pinterest, and Twitter. Here’s to a magical life!

On Restocking Your Refrigerator

At last!  You finally get the chance to restock your fridge.  The week was a study in making some hastily bought lettuce, eggs, beets, last until you could go grocery shopping properly.  Your fridge has stood forlornly in the corner of your kitchen, almost empty except for a stray bread end and your meager staples.  This simply will not do.

It is sweet relief to enter the store, to fill your cart with fresh basil and wine and aged Gouda cheese--the essentials.  Your heart is light as you pile on the berries that have suddenly come in-season while you were away, yes they will fill your shelves nicely.  And you cannot live without radishes.  Or organic lemons.  Or, frankly, dates.  So in your cart they go.

Then there is the question of dinner for the next few days.  You already know your weekend breakfasts will be omelet filled (you select heirloom tomatoes, mushrooms, sweet onions).  The heat makes you crave nothing but crisp salads, light fish, fresh fruit.  You feel a menu forming in your head: salt and pepper calamari with beet and radish salad.  Then pesto pizza with those heirloom tomatoes the next night.  You even eye the apricots--not quite ripe yet, and wonder if you can turn them into a 5-minute refrigerator jam.  Your mind cannot stop forming recipes, meals, kitchen experiments. 

At home again, you unload your bounty into your now happy refrigerator, marveling at its shelves, almost bursting with whole foods. You must celebrate.  You take the freshly-made sparkling water and mix it with grapefruit juice and basil simple syrup (newly made with the basil only just purchased) for a festive mocktail; happy to once again have an arsenal of goodies at your disposal, ready for anything from a simple meal to an impromptu get-together with family.  You try to enjoy your drink on the patio, but it doesn't last.  You find yourself in front of the fridge, enjoying your modern day cornucopia, sipping your drink.  It is good to be home.

Enchantment Learning & Living is an inspirational blog celebrating life’s simple pleasures, everyday mysticism, and delectable recipes that are guaranteed to stir the kitchen witch in you. If you enjoyed what you just read and believe that true magic is in the everyday, subscribe to my newsletter below for regular doses of enchantment. Want even more inspiration? Follow me on Instagram, Facebook, Pinterest, and Twitter. Here’s to a magical life!

Spain's Gin Tonic: 5 Steps to Perfection

Perfect after a day at the beach it Sitges!

Perfect after a day at the beach it Sitges!

Spain is famous for its love of gin tonic--and no, I didn't forget the "and" in "gin & tonic."  The Spanish simply forget the "and" and go straight for the tonic. It seems only fitting that since I am both visiting Spain and love a good G&T that I should learn more about Spain's obsession with the drink--and how to make a perfect one!  So here's what I've learned so far:

1. They like their ice cubes big.  Bigger ice cubes mean the drink won't melt into tastelessness in the blink of an eye and the drink will stay cooler longer.

2. Choose good gin.  This should be a no-brainer.  The quality of a drink is dependent on its ingredients.  I use to order G&Ts at bars because they are hard to mess up--but now I realize you really can taste the difference between a cheap well gin and a solid one.  I recommend the inexpensive New Amsterdam gin for those of you who like a more citrus forward gin reminiscent of vodka.  If you are looking to splurge a little, Hendrick's gin offers a wonderful botanical element to your drink.

3. Use quality tonic water.  This means avoiding tonic water with fake sugar--another seemingly obvious rule, but one that is often overlooked.  Real sugar preserves the taste and frankly, is actually safer for you to drink than artificial sweeteners.  A good, but more expensive brand is Fever-tree, which doesn't have any artificial sweeteners or preservatives.  For a less expensive option, try Hansen's Natural Tonic, sweetened with natural sugar cane and containing no preservatives.

4. Don't over think the garnishes, according to the Spanish.   Lime is always the best option. While they like to add a little flair to the gin tonics with interesting flavors like lavender, they suggest that you shouldn't overload your drink with too many garnishes.  It's a drink, not a salad!

5. Keep it simple.  Sure there are lots of fun twists on this classic drink, including my Grape-Lime G&T. Just don't get so caught up on the flavor riffs that you lose sight of the basic flavor profile of a good drink: the bright flavor of the lime, the floral kick of the gin, and the bitter tang of the tonic's quinine. 

Most of all, take some time to sit in the sun and enjoy your drink!

Enchantment Learning & Living is an inspirational blog celebrating life’s simple pleasures, everyday mysticism, and delectable recipes that are guaranteed to stir the kitchen witch in you. If you enjoyed what you just read and believe that true magic is in the everyday, subscribe to my newsletter below for regular doses of enchantment. Want even more inspiration? Follow me on Instagram, Facebook, Pinterest, and Twitter. Here’s to a magical life!
On Kitchen Sink-ing It

You must get creative with the food you have, using it all up before you pack your bags and head out on your next adventure.

It took all your self-control not to over-shop at the grocery store, despite the perfectly rounded artichokes and thick stalks of asparagus staring you in the face.  You bought only the bare necessities: coffee and wine.  It took even more reserve not to go to the farmers' market; that would only lead to a fridge full of spring's bounty--tender lettuce, red radishes, and if you were lucky, garlic scapes.

You know mustn't do that, hard as it is.  Everything but the kitchen sink must go, so you pile your plate with all manner of strange meals. You are traveling soon--that phrase playing round and round your head, a constant reminder--and have to clean out your fridge of anything and everything that won't last till you get back. 

It has been a series of creative lunches and kitchen-sink dinners.  There was the breakfast omelet with one and a half bell peppers and small wedges of several different kinds of hard cheeses; the lunch of quick pickled carrots, radishes, and cucumbers; the simple dinner of crudités and aioli to use up those eggs and any stray vegetables at the bottom of your crisper.  Everything must go!

Then there is the carton of half and half that you try to ration out across the next four mornings, so you don't have to buy another and have it go to waste.  There is the watermelon you had forgotten about--the one you intended to juice.  A watermelon cooler must be made, perhaps several.  You will diligently work on whittling down the contents of your fridge until it is nothing but bare shelves and butter, mustard jars and a wine bottle.

It's as integral to your travel preparations as packing your bags and boarding that plane.  Yes, this is kitchen sink-ing it.

Enchantment Learning & Living is an inspirational blog celebrating life’s simple pleasures, everyday mysticism, and delectable recipes that are guaranteed to stir the kitchen witch in you. If you enjoyed what you just read and believe that true magic is in the everyday, subscribe to my newsletter below for regular doses of enchantment. Want even more inspiration? Follow me on Instagram, Facebook, Pinterest, and Twitter. Here’s to a magical life!

3 Citrus-Ginger Gin Fizz

In honor of my wonderful patio garden, I had my family over for dinner last night.  It was a perfect garden party (albeit a patio garden party) filled with the bounty of spring.  We had radishes and young beets in our salad, asparagus and roasted lamb seasoned with herbs from my garden on our plates.  There was also fresh pesto crostini for appetizers and, of course, a beautiful view of my potted plants.  Naturally, when you have a garden party, you need a cocktail that tastes like spring in a glass, which is why I developed my 3 citrus-ginger gin fizz. 

A traditional fizz is simply gin, lemon, a little sugar, and sparkling water--an absolutely refreshing way to wind down a warm spring day.  I've added a twist to this recipe by using three types of citrus--grapefruit, lemon, and lime--and the addition of ginger simple syrup in place of the sugar.  There are few combinations as heavily as citrus and ginger in my book--they play on each other's brightness.  Make sure to use freshly squeezed citrus juice--the bottled kind doesn't have as bright a flavor and contains lots of hidden sugars. You can also skip the gin and have a refreshing mocktail, as my pregnant sister did.

Even if you aren't hosting a garden party anytime soon, I'd recommend enjoying this cocktail to kick off your Saturday night!

IMG_3061.JPG

Ingredients:

Juice of 1 grapefruit

Juice of 1 lemon

Juice of 1 lime

6 ounces (3 shots) ginger simple syrup

Sparkling water

Combine three juices together in a mason jar or other container.  In four glasses, add one shot of the juice mix to each glass and 1/2 shot (.75 ounces) of ginger simple syrup.  Top with ice.  Fill the glass to the top with sparkling water and stir.  Enjoy in a shady grove, patio garden, or other lovely outdoor space.  Serves 4.


Enchantment Learning & Living is an inspirational blog celebrating life’s simple pleasures, everyday mysticism, and delectable recipes that are guaranteed to stir the kitchen witch in you. If you enjoyed what you just read and believe that true magic is in the everyday, subscribe to my newsletter below for regular doses of enchantment. Want even more inspiration? Follow me on Instagram, Facebook, Pinterest, and Twitter. Here’s to a magical life!

Ginger Simple Syrup

Ginger is one of those epic all-around healing foods that I can't get enough of.  It adds brightness and spice to everything from a good Asian stir-fry to my morning quinoa.  This time of year I absolutely love it as an ingredient in the sunny warm-weather cocktails & mocktails that become so appealing after a day spent outdoors.  You can also mix it with sparkling water to make a light, refreshing soda.  In either case, my ginger simple syrup is an ingredient I like to keep on hand for those impromptu fancy drinks that feel like summer in a glass.

Ingredients:

1 cup sugar

1 cup water

1/4-inch by 1-inch chunk of fresh ginger, peeled and sliced thinly

To make the simple syrup, bring water and ginger to a boil. Stir in sugar until fully dissolved.  Reduce heat.  Simmer for 5 minutes.  Remove from heat and let cool completely.  Strain out ginger and pour syrup into a mason jar.  Store in fridge for about one week.  Make approximately 1 cup of syrup. 

Enchantment Learning & Living is an inspirational blog celebrating life’s simple pleasures, everyday mysticism, and delectable recipes that are guaranteed to stir the kitchen witch in you. If you enjoyed what you just read and believe that true magic is in the everyday, subscribe to my newsletter below for regular doses of enchantment. Want even more inspiration? Follow me on Instagram, Facebook, Pinterest, and Twitter. Here’s to a magical life!

Bathe Like an Egyptian Bath

Legend has it that Cleopatra used to bathe in milk and honey--the perfect recipe for soft, hydrated skin.  Naturally, I thought of this as the perfect antidote to the dry skin the change of seasons can bring on.  It feels purely decadent to soak in this rich liquid and your skin feels incredible afterward.  The lactic acid in the milk gently exfoliates your skin, while the honey helps it retain moisture and acts as an anti-inflammatory agent.  I recommend full-fat milk since it is mega-nourishing for your skin--so save the two percent for drinking.  Organic is also a must--who wants anything treated with unnatural things on their skin? Plan to take some time in the bath: grab a good book, drink a cup of chamomile tea, and feel as pampered as an Egyptian queen!  And feel free to imagine scantily clad buff servants fanning you with big palm leaves as you soak.

Ingredients:

2 cups whole milk

1/2 cup honey

Favorite bubble bath (optional)

Pour milk and honey under running water.  Make bath water hot but not too hot.  Add bubbles if desired.  Soak in bath for at least 30-45 minutes. For best results, exfoliate before bathing and slather on your favorite body butter after.  Enjoy!

Note: be sure to clean your bath after so you don't leave traces of milk and honey in it. 

Elizabeth Taylor as Cleopatra in the 1963 film by the same name. Bathing never looked so glamorous!

Elizabeth Taylor as Cleopatra in the 1963 film by the same name. Bathing never looked so glamorous!

Enchantment Learning & Living is an inspirational blog celebrating life’s simple pleasures, everyday mysticism, and delectable recipes that are guaranteed to stir the kitchen witch in you. If you enjoyed what you just read and believe that true magic is in the everyday, subscribe to my newsletter below for regular doses of enchantment. Want even more inspiration? Follow me on Instagram, Facebook, Pinterest, and Twitter. Here’s to a magical life!

Chamomile Face Toner

Lately, I have been loving chamomile!  It's gentle apple taste and nurturing properties have made it my go-to bedtime tea these past few weeks and I've even enjoyed using it as a steep for soothing bubble baths and beauty treats.

One of my all-time favorite chamomile beauty treats is the face toner I make out of brewing a strong cup of these little flowers.  It treats puffiness, inflammation, and irritated skin, perfect for this time of year when the season change can wreak havoc on our skin--especially with all this dry, windy weather we've been having in Albuquerque!  This toner is also great for sensitive skin; it simply soothes and heals, without drying or exposing your skin to harmful chemicals like mainstream toners.  So if your face needs a little extra TLC, try this--it's super easy!

Ingredients:

1 heaping tablespoon chamomile

1 cup water

Bring water to a boil--pour into mug.  Add chamomile and let steep for five minutes. Pour tea through a strainer and into a mason jar (keep the lid off for now).  Allow to cool completely.  Store in a mason jar in the fridge for up to one week.  To use, simply dab a cotton ball in the tea toner and rub on a freshly washed face.  This is gentle enough to use in the morning and again at night.  Enjoy!

Enchantment Learning & Living is an inspirational blog celebrating life’s simple pleasures, everyday mysticism, and delectable recipes that are guaranteed to stir the kitchen witch in you. If you enjoyed what you just read and believe that true magic is in the everyday, subscribe to my newsletter below for regular doses of enchantment. Want even more inspiration? Follow me on Instagram, Facebook, Pinterest, and Twitter. Here’s to a magical life!

Spritz Cocktail

This time of year has me pining for travel and adventure--especially now that school is almost at an end.  It is as if the long weeks of grading papers have finally caught up with me and I can no longer sit still.  I want to move, to be moved, to saturate myself in the bounty of life: art, food, music, laughing, loving. 

And yet vacation is still a month away.  So how do I cope?  Easy!  I bring the fun to me!  One of the ways I do this is by recreating the wonderful foods and drinks I experienced during my own travels, especially to my travels in Italy, where people really know how to enjoy themselves.

One of my favorite evening cocktails is the Italian spritz, made with Aperol (a bitter orange liquor) and sparkling wine.  I was introduced to this drink by my younger sister, an artist who lives in Florence, when I went to visit her and her writer husband last summer.  There is nothing more refreshing than this bubbly orange drink after a day of museum viewing, city wandering, and food tasting.  Of course, when traveling, you should eat (and drink) like the locals, so I was more than happy to try a local favorite cocktail for apertivo, or the Italian version of cocktail hour. 

That said, back state side the drink could be a little too sweet for me, since I wasn't drinking right by the River Arno.  Still, I love the idea of the spritz, so I decided to see if I could whip up a version that I could enjoy at home while dreaming of my Tuscan adventures.  Typically the spritz is made with 2 parts Aperol, 3 parts sparkling wine, and one part sparkling water.  I reduced the amount of Aperol and had my fellow spritz drinkers try it.  Viola!  We were left with a perfect drink.  Feel free to try it the traditional way too, if you like sweeter drinks.

Ingredients:

.75 oz (about 1/2 shot) Aperol

5 oz (about 3-4 shots) of a dry sparking white wine

1.5 oz (1 shot) sparkling water

Ice (optional)

Pour aperol into the bottom of a glass.  Add sparkling wine and sparkling water.  Add ice if desired--sometimes I put it in, sometimes I don't.  Serves one (so double the recipe and invite another adventure seeking friend to join you!).  Pairs well with a sunny, Tuscan attitude and a lovely patio garden. 

Looks like the perfect way to celebrate the end of the week!

Looks like the perfect way to celebrate the end of the week!

Enchantment Learning & Living is an inspirational blog celebrating life’s simple pleasures, everyday mysticism, and delectable recipes that are guaranteed to stir the kitchen witch in you. If you enjoyed what you just read and believe that true magic is in the everyday, subscribe to my newsletter below for regular doses of enchantment. Want even more inspiration? Follow me on Instagram, Facebook, Pinterest, and Twitter. Here’s to a magical life!

Lavender Gimlet

This time of year, I always start craving bright, fresh cocktails that are evocative of the season's bounty--fledgling herbs and the green citrus notes that seem to permeate the air come April.  They are a great way to kick off a fun Saturday night dinner or linger over with a friend in the garden. 

One of my all-time favorite spring cocktails is the gimlet.  Cousin to the margarita and the whiskey sour, it is a simple mixture of freshly squeezed lime juice and gin, easy to make and so refreshing--especially after a day of gardening!  I was contemplating a gimlet for this very reason last night while tending to my lavender when a thought occurred to me.  Wouldn't my gimlet be just divine with a hint of lavender flavor?   Yes, yes it would.  And it was. 

Some people prefer to make gimlets with vodka, but for this recipe, the herbaceousness of a good gin compliments the lavender nicely.  I used the local Santa Fe Spirits' Wheeler's Gin, but any quality gin will do.  Also, use fresh lime juice--that neon green fake stuff at the liquor store is just plain gross and the bottled stuff doesn't have the zing you need to balance out the sweetness of the lavender simple syrup.  To learn how to make this easy, simple syrup recipe, click here.

Cocktail Ingredients:

1.5 oz lime juice (1 shot)

3 oz gin (2 shots)

ice

.75 oz lavender simple syrup (1/2 shot)

Combine all ingredients in a shaker and shake well.  Pour into a glass and enjoy!

Perfect after a day of gardening!

Perfect after a day of gardening!

Enchantment Learning & Living is an inspirational blog celebrating life’s simple pleasures, everyday mysticism, and delectable recipes that are guaranteed to stir the kitchen witch in you. If you enjoyed what you just read and believe that true magic is in the everyday, subscribe to my newsletter below for regular doses of enchantment. Want even more inspiration? Follow me on Instagram, Facebook, Pinterest, and Twitter. Here’s to a magical life!

Lavender Simple Syrup

I absolutely love lavender!  I like to use it as a simple perfume, a spritz of aromatherapy, a fancy topping for a spring salad, sprinkled in my baked goods, and, of course, as an extra zing to my drinks.  It has a rich, floral taste that compliments just about anything and has amazing healing properties, too. 

Not only is it antiseptic, but it's also a gentle pain reliever and overall nerve tonic.  I like to make this simple syrup to have on hand to add to lemonade or cocktails to make them feel extra special.  It even elevates everyday sparkling water to a fancy lunchtime beverage.  Spring seems like the perfect time to keep this simple syrup on hand as it is evocative of the fresh, floral energy of the new season. 

Ingredients:

3 tablespoons dried lavender buds

1 cup sugar

1 cup water

To make the simple syrup, bring water and lavender to a boil. Stir in sugar until fully dissolved.  Reduce heat.  Simmer for 5 minutes.  Remove from heat and let cool.  Strain out lavender buds and pour syrup into a mason jar.  Store in fridge for about one week.

Enchantment Learning & Living is an inspirational blog celebrating life’s simple pleasures, everyday mysticism, and delectable recipes that are guaranteed to stir the kitchen witch in you. If you enjoyed what you just read and believe that true magic is in the everyday, subscribe to my newsletter below for regular doses of enchantment. Want even more inspiration? Follow me on Instagram, Facebook, Pinterest, and Twitter. Here’s to a magical life!